A Note on Hardware
Video recording is very demanding on your computer. An NVIDIA video card is highly recommended as it can handle video encoding without slowing down your game performance. Ensure you have the latest drivers for your graphics card.
Part 1: Prepare Your "Set" (In-World Setup)
First, make the world look as good as possible inside the viewer.
Viewer Graphics Settings
Just like for photography, you need to max out your graphics.
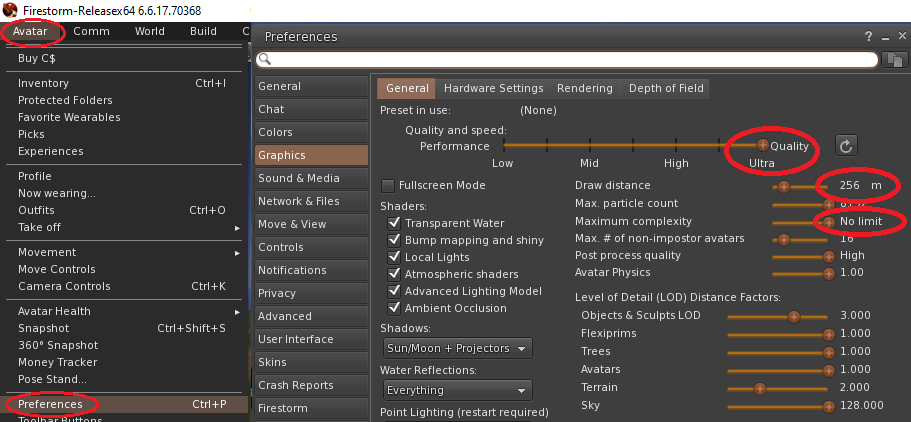
- Go to Avatar > Preferences > Graphics.
- Set the main slider to Ultra.
- Ensure Draw Distance is `256m` and Avatar Complexity is `No limit`.
Hide the User Interface (UI)
You don't want menus and buttons in your final video. The shortcut to hide all UI elements is:
Ctrl + Alt + F1
Press the same combination again to bring the UI back.
Part 2: Configure Your "Camera" (OBS Studio)
These are the recommended one-time setup steps for OBS Studio for recording high-quality video.
2.1 - Add a Source
Tell OBS what you want to record.
- In the "Sources" panel, click the `+` icon.
- Select Window Capture.
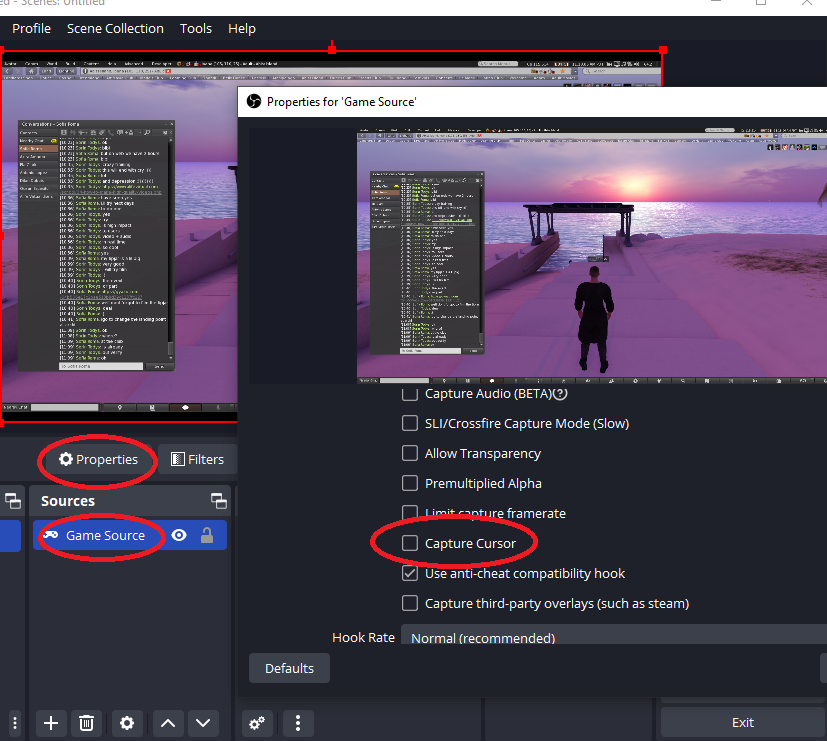
- In the properties window, select the Alife Virtual viewer from the `Window` dropdown.
- Uncheck Capture Cursor to hide your mouse pointer. Click OK.
2.2 - Video Settings
Set your recording resolution and frame rate.
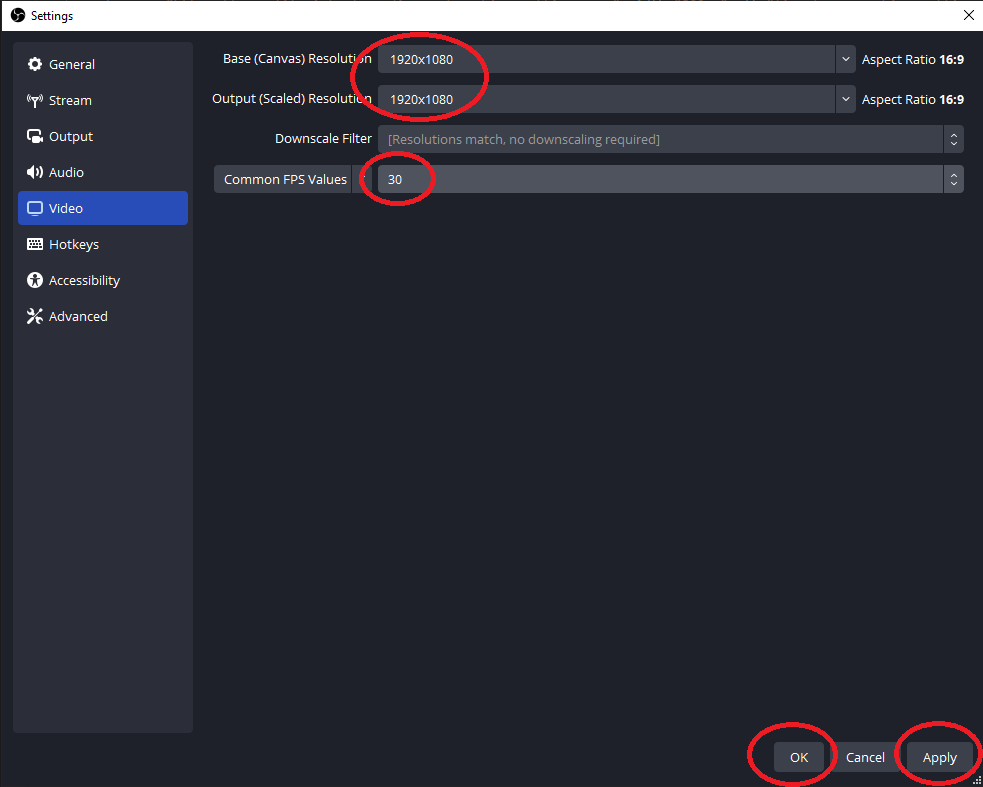
- Go to File > Settings > Video.
- Set `Base (Canvas) Resolution` to `1920x1080`.
- Set `Output (Scaled) Resolution` to `1920x1080`.
- Set `Common FPS Values` to `30` or `60`. (30 is standard, 60 is smoother).
2.3 - Output Settings
Configure the quality and format of your final video file.
- Go to File > Settings > Output.
- Set `Output Mode` to Advanced at the top.
- Click the Recording tab.
- Set `Type` to `Standard`.
- Set `Recording Format` to MP4.
- Set `Video Encoder` to NVIDIA NVENC H.264 (if available). If not, use `x264`.
- Set `Rate Control` to `CQP` and `CQ Level` to `20` (lower is higher quality). A good alternative is `CBR` with a `Bitrate` of `8000 Kbps` for 1080p30.

Part 3: Action! Your Recording Checklist
Follow these steps every time you want to record.
- Frame Your Shot: In Alife Virtual, position your camera and avatars for the scene you want to film.
- Check OBS Preview: Look at your OBS window. Does the preview show your game correctly? Right-click the source and choose `Transform > Fit to screen` if needed.
- Check Audio Levels: In OBS's "Audio Mixer", mute your `Mic/Aux` if you don't want to record your voice. Watch the `Desktop Audio` meter to see if in-world sounds are being captured.
- Hide the UI: Switch back to the Alife Virtual window and press Ctrl + Alt + F1.
- Start Recording: Click the "Start Recording" button in OBS.
- Perform the Action: Do whatever you planned to film in-world.
- Stop Recording: Click "Stop Recording" in OBS. Your video file is now saved! You can find it by going to `File > Show Recordings`.
You can now edit your video file in any video editor, like Blender, DaVinci Resolve, or Adobe Premiere.
Suggestions for New Content and Images
To Make This Guide Even Better:
- `obs-guide-output-settings.jpg`: The current `obs-outputs.png` image shows settings for streaming, not recording. A new screenshot of the `Settings > Output > Recording` tab (in Advanced mode) is crucial for this guide to be accurate.
- Add an Audio Section: Briefly explain the two main audio channels in OBS: `Desktop Audio` (for in-world sounds) and `Mic/Aux` (for your microphone). This clarifies how to record game sounds with or without voiceover.
- Simplify the "Start Recording" Section: I have restructured the end of the guide into a simple, repeatable checklist, which is much more practical for users than a wall of text.