Step 1: Get Your Tools
You'll need an audio stream server from us and the VirtualDJ software.
Install VirtualDJ on your computer before continuing.
Step 2: Configure VirtualDJ
You only need to do this one time. We will connect VirtualDJ to your stream server.
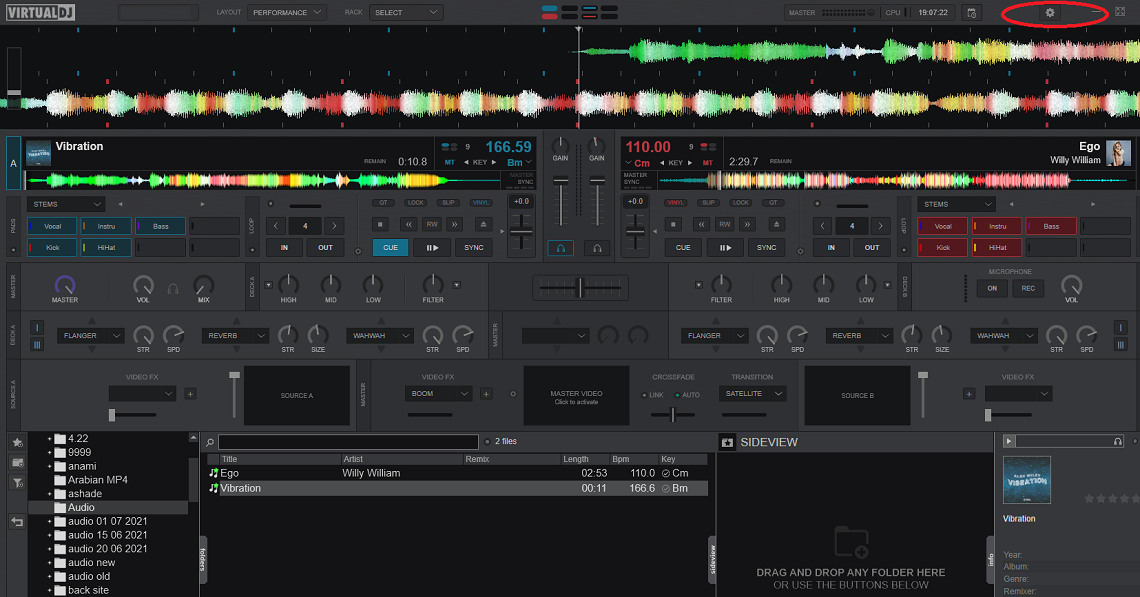
2.1 - Open Settings
In the VirtualDJ main window, click the Settings (gear) icon, usually located in the top right.
2.2 - Go to Broadcast Settings
In the Settings menu, click on the BROADCAST tab.
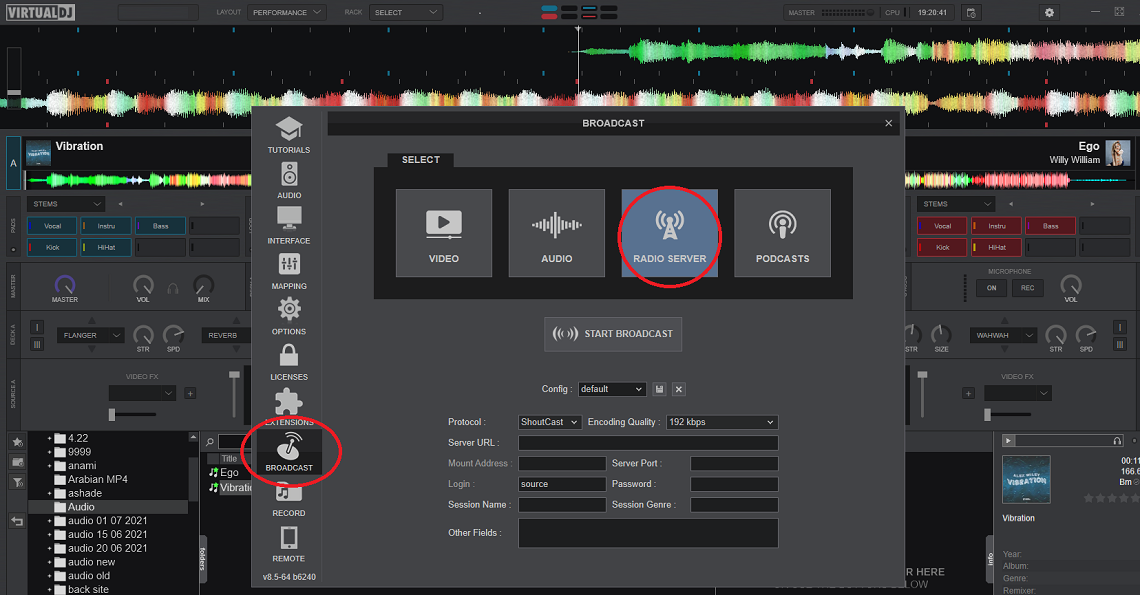
2.3 - Enter Your Server Details
This is the most important step. Fill in the fields exactly as provided in your stream server email.
- Protocol: ShoutCast
- Server: Your server's IP address or hostname (e.g., `s1.alifevirtual.com`).
- Port: Your server's port number.
- Password: Your DJ or stream password.
- Mount: Leave this EMPTY for Shoutcast v1 servers.
Stream Quality:
- Format: MP3
- Bitrate: Select your desired quality. `128kbps` is standard, `192kbps` is high quality.
Step 3: Go Live!
You're all set up. Now it's time to start your DJ set.
- Load Your Music: In the main VirtualDJ window, load your tracks onto the virtual decks.
- Start Broadcasting: Go back to the Settings > BROADCAST window and click the START BROADCAST button. You should see the connection time start counting up. You can now close the settings window.
- Set the Stream In-World: Go to your parcel in Alife Virtual. Open the About Land > Sound tab and paste your full stream URL into the `Music URL` field (e.g., `http://s1.alifevirtual.com:8000/stream`).
- Start Playing: Press the play button on a deck in VirtualDJ. Your music is now live in-world for everyone on your land to hear!
Suggestions for New Content
To Make This Guide Even Better:
- Create a New Settings Image: The `virtualdj-audio-2.png` image is a good start. A better version would show all the fields filled in with clear, example data (e.g., `Server: s1.alifevirtual.com`, `Port: 8000`, etc.) to reduce user confusion.
- Add a Microphone Section: A brief section explaining where to find the microphone settings in the `AUDIO` tab and how to use the 'Mic On' button on the main interface would be extremely helpful for DJs who talk to their audience.
- Clarify `Login` vs `Password`: The original guide mentioned `Login: source`. This is often not needed for Shoutcast v1. The current guide simplifies this, but an advanced tip could mention that the `Username` field in VirtualDJ's settings is sometimes used as the login for Shoutcast v2 servers.