Alife Virtual Entertainment - How to Make High Quality Videos
Prepare to explore the limitless possibilities of Alife Virtual, the that transcends reality and immerses you in Entertainment. Are you looking to capture stunning visuals in Alife Virtual or Second Life but not sure where to start? This guide will walk you through the essential steps to make high-quality videos within the virtual world. Whether you're capturing memories or creating content, follow these instructions for the best results.
1. Update Your Software
First things first, make sure you have the latest version of the Firestorm Viewer (6.6.17) installed. This version offers the best compatibility and features for capturing high quality videos in Alife Virtual and Second Life. For optimal performance, use the OBS Video Studio for video recording. OBS Video Studio is a free and open-source software for video recording and live streaming. To install OBS Video Studio, follow these steps: 1. Click on the following link to download OBS Video Studio. 2. Once the download is complete, run the installer and follow the on-screen instructions. 3. After installation, open OBS Video Studio and proceed to the next steps in this guide. We will details all the settings you need to adjust in the next steps of this guide.
CLICK TO DOWNLOAD
2. Check Your Hardware
Your computer's performance significantly impacts the quality of your videos. A decent computer with a minimum of 4 cores CPU and 16 GB RAM is recommended. Additionally, having an NVIDIA video card can greatly enhance graphics rendering.
3. Adjust Your Graphics Settings
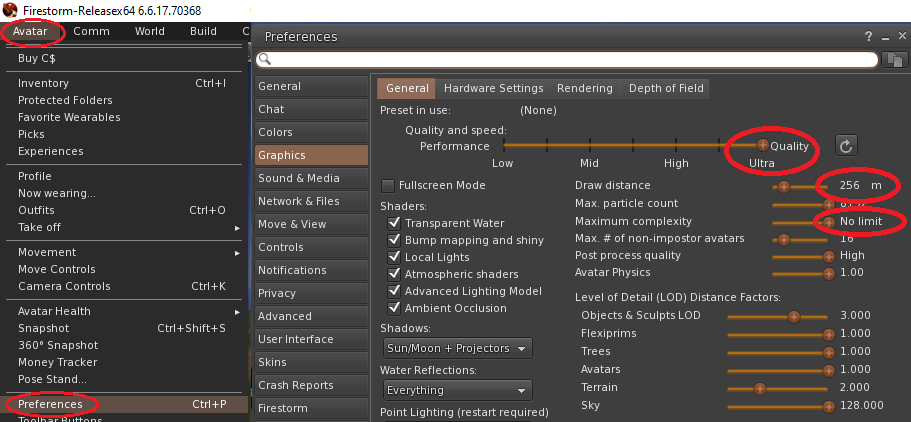
Go to Avatar > Preferences > Graphics in the Firestorm Viewer. Here, set your Performance to 'ULTRA' for the highest quality. For 1x1 sims, adjust your draw distance to 256m, and set your avatar's max complexity to 'NO LIMIT'. Zoom in all 4 directions, allowing all objects and avatars to become visible.
4. Configure OBS Video Studio
Open OBS Video Studio and click on Settings.

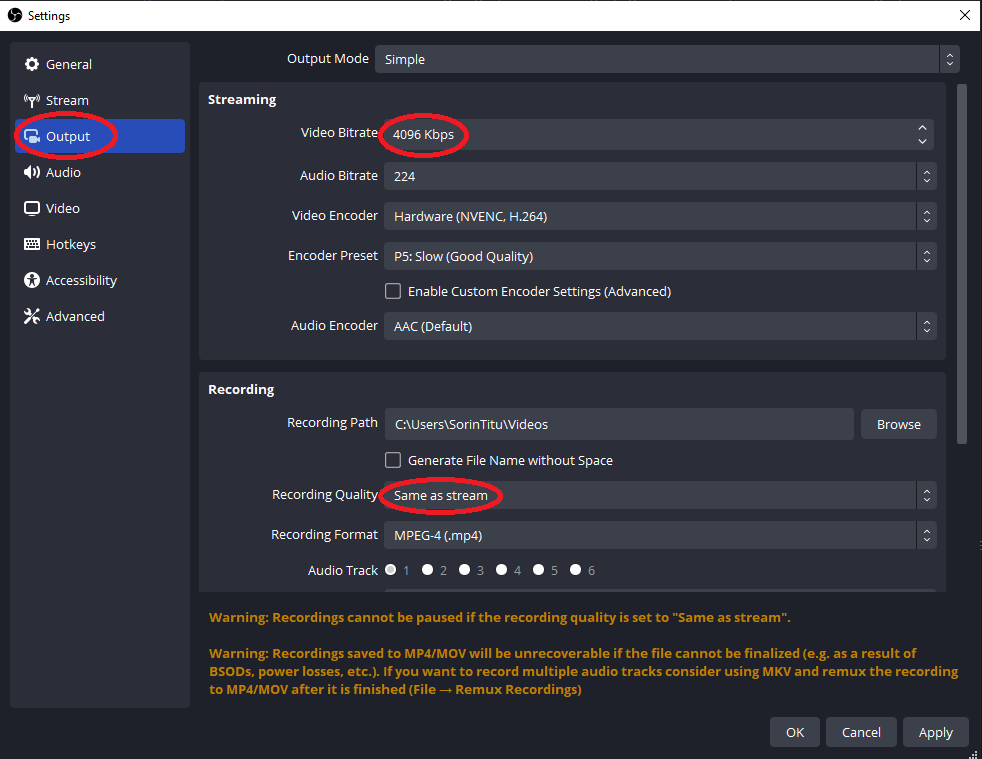
Click on Output. Set Video Bitrate: 4096 Kbps, Audio Bitrate: 224, Video Encoder: Hardware (NVENC, H264), Recording Quality: Same as stream, Recording Format: MPEG4(.mp4)
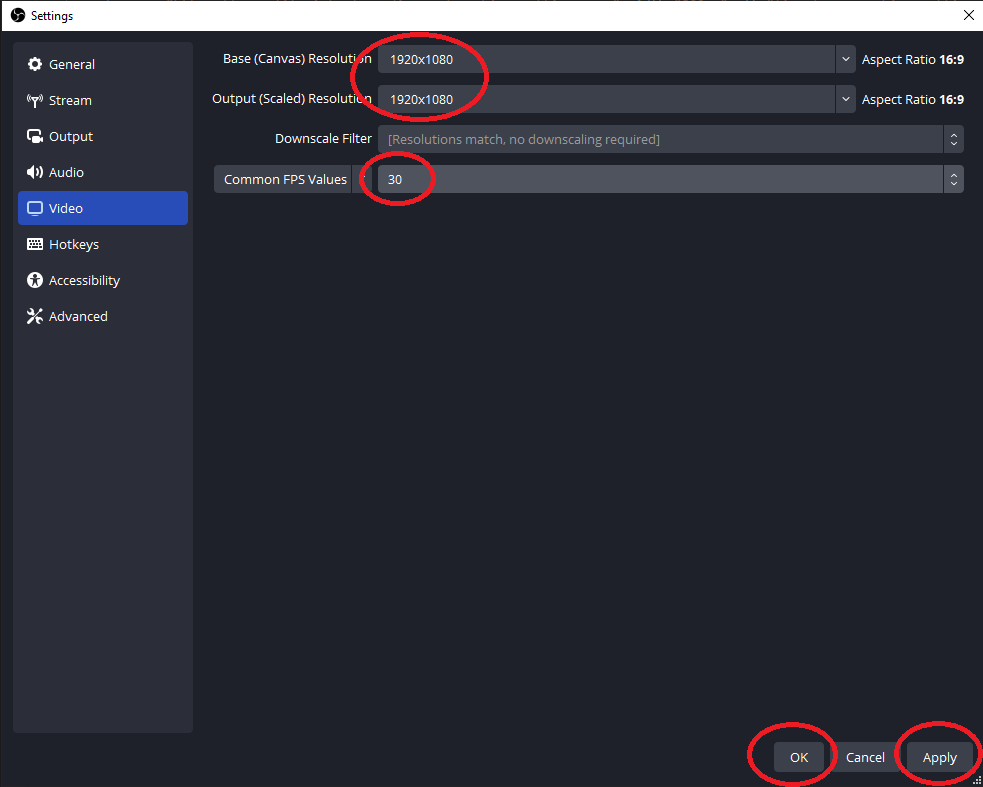
Click on Video. Set Base (Canvas) Resolution to 1920x1080, Output (Scaled) Resolution to 1920x1080 and Common FPS Values to 30. Click Apply and OK.
5. Add Sources and Scenes
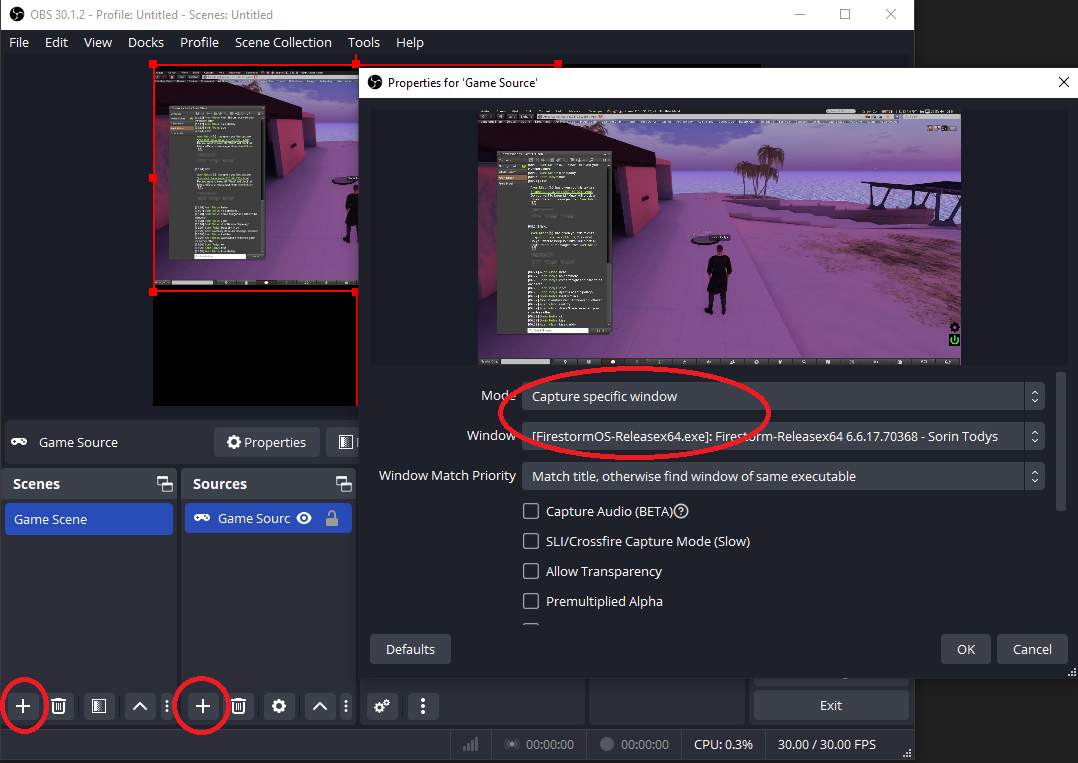
Click on the + icon under Sources and select Window Capture. Name the source and click OK. Select the Firestorm Viewer window from the drop-down menu and click OK. Click on the + icon under Scenes and name the scene. Add the source to the scene.
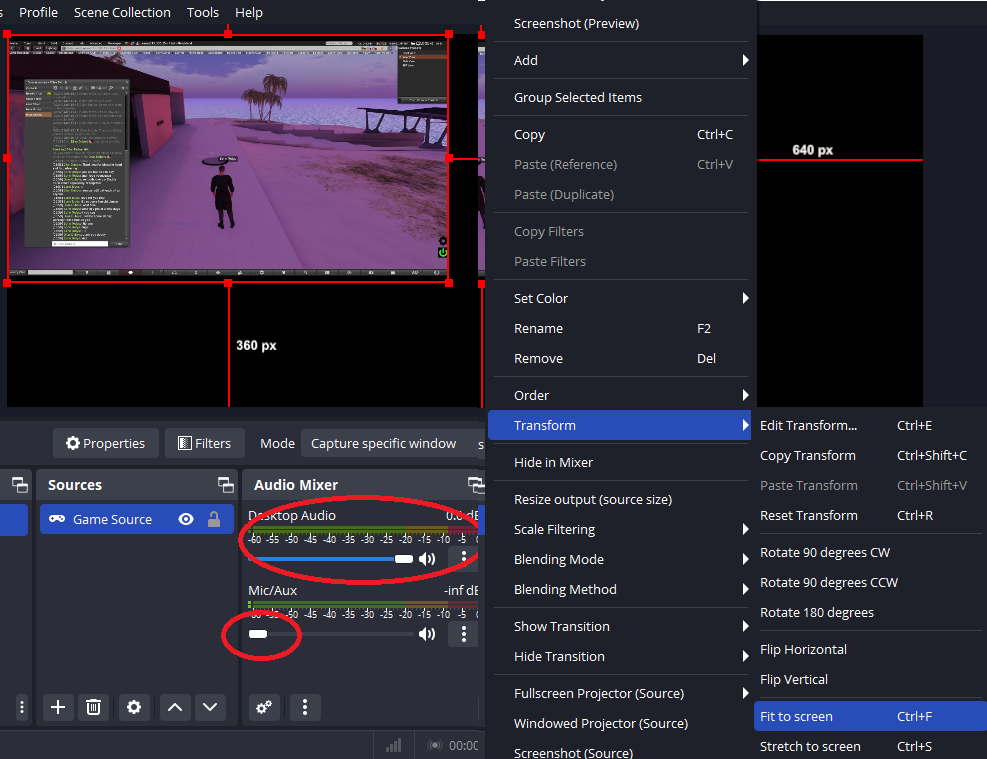
6. Set Volumes and Windows
Click on the gear icon next to the audio mixer and set the volume levels for desktop audio to maximum and mic/aux audio to minimum. Click on the video window until become red after click right on it and select Transform > Fit to Screen.
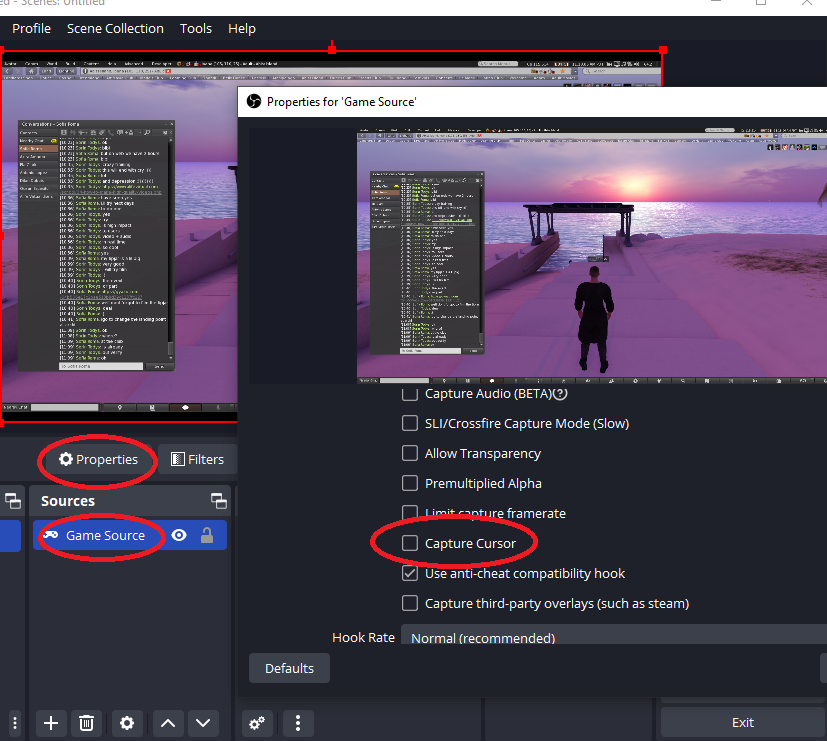
Disable mouse capture on OBS Video Studio by pressing Ctrl + F8, or click on Source, Properties, scroll down and disable Capture Cursor.
7. Start Recording
On OBS main window click on Start Recording to begin capturing your video. When you're done, click on Stop Recording to save the video to your computer. Open Firestorm Viewer and detach huds and other elements that you don't want to appear in the video. With Firestorm Viewer in focus, click on Ctrl + Alt + F1 for disable the UI interface. Press again to enable it.
8. Video Proccesing
After recording, you can use video editing software to enhance your video. I recommend you Blender, a free and open-source 3D creation suite. I will provide a guide on how to use Blender to edit your videos in the dedicated Blender tutorial.