Alife Virtual School - Class 5: EEP Windlight and Environment Settings
EEP Windlight and Environment Settings — Free class in Alife Virtual School
Welcome, Virtual World Pioneer!
Have you ever stood on a beach in Alife Virtual and marvelled at a perfect, fiery sunset? Or walked through a forest where misty, god-rays filter through the trees, creating an atmosphere of pure magic? That's not an accident; it's the power of EEP, the Extended Environment Patches system built into the Firestorm Viewer. While Alife Virtual provides stunning default environments, the true power lies in your hands to become a master of atmosphere, a painter of skies, and a director of your own virtual world's lighting.
This skill is one of the most impactful you can learn. It transforms a simple build into an immersive experience. It can turn your home from a collection of prims into a cozy retreat, or make your nightclub pulse with energy. Best of all, the skills you learn here are directly applicable to personalizing your very own free private island in Alife Virtual. While other platforms charge hundreds of dollars a month for that kind of space, Alife Virtual gives you a massive 65,536 sqm canvas to call your own, for one month, with no fees. Mastering EEP is how you'll paint it.
In this class, we'll demystify the Environment Editor and give you the step-by-step knowledge to craft breathtaking day/night cycles. Get ready to control the sun, moon, clouds, and colour of your world!
What You Will Learn
By the end of this tutorial, you will be able to:
- Navigate and understand the Firestorm Environment Editor (EEP).
- Create custom "Sky" presets from scratch, controlling everything from sun colour to haze.
- Build dynamic "Day Cycle" timelines that transition smoothly between different sky presets.
- Adjust water appearance to match your sky for a cohesive look.
- Save your EEP creations as inventory items.
- Apply your custom environments to your land and share them with other residents.
Prerequisites
Before we begin, please make sure you have the following:
- An Alife Virtual Account: This is a must! If you're not yet a member of our community of over 1,148,000 residents, you can register for free in just a few minutes.
- The Firestorm Viewer: Alife Virtual uses the powerful and popular Firestorm Viewer. Your skills here are 100% transferable from other grids like Second Life.
- Your Free Avatar and Island: This class is most fun when you have a place to practice. Make sure you've logged in and claimed your free full-body mesh avatar and your personal free private island. You can do that right here.
- Basic Viewer Skills: You should be comfortable moving your avatar and camera, opening your inventory, and interacting with menus. If you're brand new, consider starting with our earlier classes.
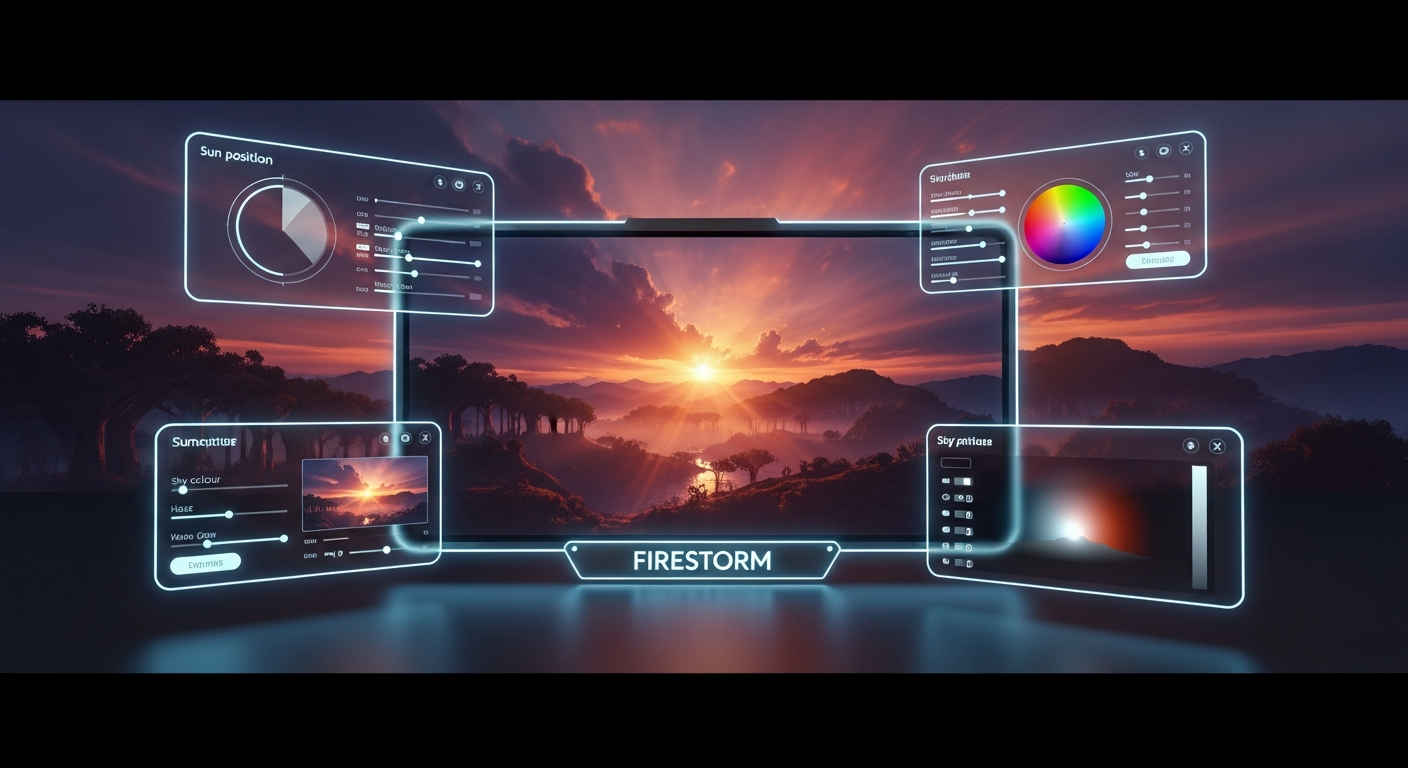
Crafting Your World: The EEP Tutorial
Ready to get your hands dirty? Let's dive in. We'll start by opening the main tool and then build a beautiful custom sunset from the ground up.
Step 1: Opening the Environment Editor
The Environment Editor is your command center for all things atmospheric. It's a powerful tool, but we'll break it down into simple, manageable parts.
- In the Firestorm Viewer, look at the menu bar at the top of your screen.
- Click World > Environment Editor. Alternatively, you can use the keyboard shortcut Ctrl + Alt + Shift + S.
- A window titled "Environment Editor" will appear. You'll see three main tabs at the top: Sky Presets, Water Presets, and Day Cycles.
[Screenshot: The Firestorm Environment Editor window is open, showing the three main tabs. The "Sky Presets" tab is active, displaying a list of default sky settings like "[AV] Midday" and "[AV] Sunset".]
Tip: You can also access a simplified environment panel by clicking World > Environment Profile. This lets you quickly select existing presets, but for creating new ones, the full editor is what we need.
Step 2: Creating a New Custom Sky Preset
A "Sky" preset is a static snapshot of the environment. It defines the colour of the sky, the position of the sun, the type of clouds, and much more. We're going to create a dramatic sunset.
- Make sure you are on the Sky Presets tab.
- You'll see a list of existing presets. You can't edit these directly, so we'll make our own. Click the New button at the bottom of the window.
- A prompt will ask you to name your new preset. Let's call it
My Alife Sunsetand click OK. - Your new preset will now appear in the list, and all the controls on the right side of the window will become active. You'll see four more tabs: Sun/Moon, Atmosphere, Clouds, and Advanced.
Step 3: Sculpting the Sky - Sun, Atmosphere, and Clouds
This is where the artistry begins. We'll go through the most important tabs and settings to create our sunset.
A. The Sun/Moon Tab
This tab controls the primary light source in your scene.
- Sun/Moon Position: This slider controls the time of day. For a sunset, drag the slider to the right, towards "Sunset". A value around 0.22 - 0.24 is a good starting point for the sun to be low on the horizon.
- Sun/Moon Color: This is the colour of the direct light from the sun. Click the color swatch. For our sunset, choose a warm, saturated orange or a deep red.
- Ambient: This is the crucial one! It's the colour of the light in the shadows. For a realistic sunset, the ambient light should be a complementary, darker colour. If your sun is bright orange, try a muted, dark blue or purple for the ambient. This contrast makes lighting pop.
- Sun Glow: This controls the size and intensity of the halo around the sun. For a dramatic sunset, increase the Focus and Size slightly.
[Screenshot: The Sun/Moon tab is active. The Sun/Moon Position slider is set near sunset, the Sun/Moon Color swatch is a vibrant orange, and the Ambient color swatch is a deep, dark blue.]
B. The Atmosphere Tab
This tab controls haze and aerial perspective, which gives a sense of depth and distance.
- Haze Horizon: Controls the color of the haze at the horizon line. For our sunset, click the swatch and pick a colour that complements your sun. A soft, hazy yellow or pink works well.
- Haze Density: This slider controls how "thick" the haze is. A higher value will make your scene look foggier and obscure distant objects. For a clear but atmospheric sunset, a value around 0.15 - 0.25 is effective.
- Density Multiplier: This is a powerful setting that affects how much the sky colour itself tints the entire scene. For a very stylised, colourful sunset, you can push this up to 1.5 or even 2.0. For a more realistic look, keep it closer to 1.0.
Warning: Pushing the Haze Density and Density Multiplier too high can completely wash out your scene in a single colour. Use a delicate touch and observe the changes in real-time.
C. The Clouds Tab
No sky is complete without clouds!
- Cloud Color: At sunset, clouds are lit from below by the sun. Click the colour swatch and choose a colour that reflects this. A mix of pinks, oranges, and purples looks fantastic. Don't be afraid to make it vibrant!
- Cloud Coverage: This slider determines how much of the sky is covered by clouds. Set it to your desired level. A value of 0.2 - 0.4 gives you some nice scattered clouds without being overcast.
- Cloud Scroll X / Y: These controls make the clouds move! You can set a slow speed (e.g., 0.01 on the X-axis) to give your sky a subtle, dynamic feel.
Step 4: Building a Day Cycle
A single sky preset is nice, but a Day Cycle is what brings your world to life. A Day Cycle is a timeline where you place different Sky presets at different "times." The viewer then automatically transitions between them.
- First, SAVE YOUR SKY! In the Environment Editor, with
My Alife Sunsetselected, click the Save button at the bottom. This saves it as an item in your inventory, in the "Settings" folder. - Now, click the Day Cycles tab at the top of the Environment Editor.
- Click the New button and name your cycle
My Island Day/Night. - You'll now see a timeline at the bottom of the window, marked with times like 12 AM, 6 AM, 12 PM, 6 PM.
- Open your Inventory (Ctrl+I) and navigate to your "Settings" folder. Find your
My Alife Sunsetitem. - Drag and drop
My Alife Sunsetfrom your inventory onto the timeline at the 6 PM mark (18:00). A keyframe will appear. - Now, let's add a midday setting. In the Sky Presets list inside the editor, find a default bright sky like
[AV] Midday. Drag it from the list onto your timeline at the 12 PM mark (12:00). - Do the same for a night sky. Find
[AV] Midnightand drag it to the 12 AM mark (0:00). - Finally, click the Save button at the bottom of the editor. This will save your
My Island Day/Nightcycle into your inventory's "Settings" folder.
[Screenshot: The Day Cycles tab is active, showing a timeline with three keyframes: "[AV] Midnight" at 0:00, "[AV] Midday" at 12:00, and "My Alife Sunset" at 18:00.]
Step 5: Applying Your Day Cycle to Your Land
You've built it, now it's time to activate it on your land. This is how you make your custom atmosphere the default for anyone who visits your free 10,000 prim island.
- Stand on your parcel of land.
- Go to the top menu: World > Parcel Details.
- In the "About Land" window, click the ENVIRONMENT tab.
- You will see a box labelled "Use Day Cycle".
- Open your inventory, find your
My Island Day/Nightsetting object, and drag it into this box. - That's it! The parcel will now use your custom day cycle. To see it in action, you can go to World > Sun Position and drag the slider to watch the sky transition beautifully through your presets.
Power User Tip: As an island owner in Alife Virtual, you have Estate Manager rights. This means you can set the environment for the entire region, not just your parcel. Go to World > Region/Estate > Estate tab and set your Day Cycle in the "Environment" section there.
Common Mistakes and How to Avoid Them
As you experiment, you might run into a few common issues. Here’s how to sidestep them.
- Mistake: Overly Saturated or "Clown" Colors.
It's tempting to push all the color sliders to the max. This often results in a scene that looks garish and unnatural.
Solution: Use restraint. Look at reference photos of real skies. Notice how most of the sky is often a muted color, with vibrancy concentrated near the sun or clouds. Use the "Ambient" light setting to create depth with contrasting, darker colors, not just more bright ones. - Mistake: Abrupt or "Jumpy" Day Cycle Transitions.
If you move the time slider and the light suddenly "pops" or changes drastically at a keyframe, your transitions are too harsh.
Solution: The most common culprit is a huge difference in the Ambient light value between two keyframes. Open both Sky presets and compare their Ambient color and intensity. Try to make them more similar at the transition points for a smoother blend. - Mistake: Losing Your Work.
You spend an hour creating the perfect sky, close the editor, and it's gone.
Solution: Remember that the Environment Editor does not auto-save. You must click the Save button at the bottom of the editor to commit your preset to your inventory. Save your Sky presets first, then save your Day Cycle. Save often!
Advanced Tips and Tricks
Feeling confident? Let's push the boundaries a little further.
- Matching Your Water: Go to the Water Presets tab in the editor. Create a new water setting and play with the
Fog ColorandBlur Multiplier. For a sunset, a dark, murky water color with orange specular highlights reflecting the sun can look incredible. You can add your custom Water Preset to your Day Cycle keyframes alongside the Sky preset. - Scripting the Environment: Alife Virtual has full LSL scripting support, just like Second Life. You can change the environment with a script! Create a prim, add a new script, and paste this code in:
llSetEnvironment("My Alife Sunset", llGetLinkNumber());
This LSL function will instantly apply your named sky preset when the script runs. This is perfect for creating interactive experiences. Because Alife offers free script and object uploads, you can experiment without worrying about fees. - Sharing is Caring: The EEP settings you save in your inventory are just that—items. You can give a copy to a friend! They can then use your atmosphere on their own land. This is a great way to collaborate on projects.
Practice Exercise: The Three Moods
Time to put your new knowledge into practice. This exercise will solidify what you've learned.
- Go to your free private island in Alife Virtual.
- Create three brand new, distinct Sky presets:
- "Dawn Awakening": A soft, pink and blue morning sky as the sun just crests the horizon.
- "Tropical Midday": A brilliantly bright, clear blue sky with a high sun and sharp shadows.
- "Spooky Fog": A dark, moonlit night with heavy green or gray haze, very low visibility, and no clouds.
- Save each of these presets to your inventory.
- Create a new Day Cycle named
My Three Moods. - Add your three presets to the timeline: Dawn around 6 AM, Midday at 12 PM, and the Fog at 10 PM (22:00).
- Apply this new Day Cycle to your island's parcel or estate settings.
- Take a screenshot of your "Spooky Fog" environment and share it on the Alife Virtual community forums!
Frequently Asked Questions (FAQ)
- Q1: If I set a custom environment on my land, can everyone see it?
- A: Yes! When you set a Day Cycle in the parcel or estate settings, that environment is sent to every visitor's viewer. This is how you define the official "look" of your space. They can choose to override it with their own personal setting, but yours will be the default.
- Q2: Will using complex EEP settings slow down my computer?
- A: It can, but usually not by much on modern computers. The settings that have the most performance impact are high Haze Density and heavy Cloud Coverage. If you or your visitors experience lag, try creating a "low-lag" version of your sky with less haze. Remember, Alife Virtual works on any normal desktop or laptop—no VR headset required—so it's already optimized for a wide range of hardware.
- Q3: I learned EEP in Second Life. Is it any different here?
- A: Not at all! Alife Virtual uses the same Firestorm viewer and the same EEP system. Your skills are 100% transferable. The big difference is what you can do with those skills. In Alife, you get a free 65,536 sqm island to practice on, with 10,000 prims for building and free uploads for all your textures and mesh. You have more freedom to create without the costs.
- Q4: What's the difference between a Sky Preset and a Day Cycle again?
- A: Think of a Sky Preset as a single photograph of the sky. A Day Cycle is a film strip made of multiple photographs. The Day Cycle tells the viewer which "photograph" (Sky Preset) to show at what time of day and blends them together.
- Q5: Can I sell the EEP settings I create?
- A: Absolutely! The settings you create are your own full-permission content. You can package them, set permissions, and sell them in-world, just like any other creation. It's a great way for talented atmosphere artists to contribute to the community and earn in-world currency.
Summary and Next Steps
Congratulations! You've taken a huge step toward mastering virtual world creation. You now know how to access the EEP Environment Editor, create custom Sky presets by manipulating the sun, atmosphere, and clouds, and combine them into dynamic Day Cycles. Most importantly, you know how to apply these to your own land to create truly unique and immersive experiences for yourself and your visitors.
The best way to get better is to practice. Experiment! Try to recreate the sky from a favorite movie, or a famous painting. There is no right or wrong, only what looks and feels right for your creation. Keep exploring the different sliders and see what they do.
In our next classes, we'll dive deeper into building, scripting, and avatar customization. Be sure to check the full schedule at the Alife Virtual School. There are free daily classes to help you master every aspect of our world.
Browse all our free courses here: Alife Virtual School Classes
Your World Awaits. Build it for Free.
You have the knowledge. Now you just need the canvas. Alife Virtual gives every resident a massive, full-region private island (65,536 sqm) and 10,000 prims to build with—absolutely free, for one month. No monthly land fees, no setup charges. It's your world to shape.
Ready to start creating? Register for Alife Virtual and claim your free island today!
» Register for Alife Virtual (It's Free!)
» Claim Your Free Private Island Now
🎓 Ready to Practice In-World?
Get your FREE island and practice everything you just learned — no credit card, no monthly fees.
Claim Your Free Island Now →No credit card required · Takes 2 minutes · Your island is FREE for one month