Estate Tools and Region Management
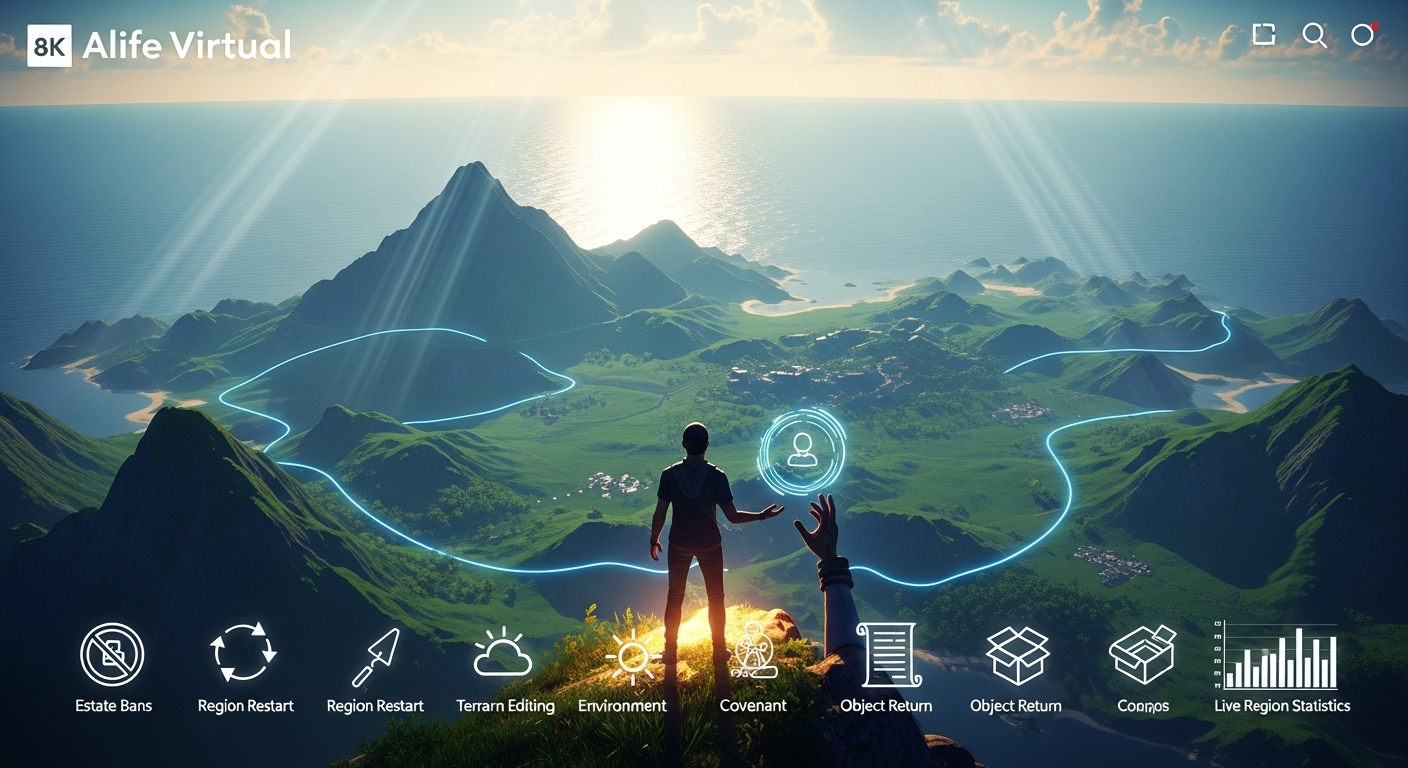
Estate Tools and Region Management — Free class in Alife Virtual School
Welcome, creators and pioneers of the metaverse! You've claimed your very own 65,536 sqm private island in Alife Virtual—a vast digital canvas awaiting your vision. But owning the land is just the first step. To truly unlock its potential and transform it from an empty plot into a thriving destination, you must master the art of governance and environmental control. This comprehensive class, Estate Tools and Region Management, is your key to becoming a true world-builder. We will dive deep into the powerful, server-side tools that allow you to dictate the laws, landscape, and even the sky of your personal corner of this expansive, free 3D world. Forget being just a resident; it's time to become a digital deity.
The Alife Advantage: Full Region Control Without the Cost
In the landscape of virtual worlds, power and control almost always come with a hefty price tag. On legacy platforms like Second Life, securing a full region is a significant financial commitment, often costing hundreds of dollars per month in tier fees, on top of initial setup costs. This creates a massive barrier to entry for aspiring creators and community leaders. Alife Virtual fundamentally disrupts this model. We believe that creativity shouldn't be paywalled. Our commitment to a genuinely free 3D world and a vibrant virtual economy is exemplified by our region policy. Every member receives a full, private island for free, for one month. The powerful estate tools you're about to learn are not a premium add-on; they are a standard feature for every single resident.
Let's put this into perspective:
| Feature | Alife Virtual Cost | Legacy Platform (e.g., Second Life) Cost |
|---|---|---|
| Full Private Region (65,536 sqm) | FREE, for one month | ~$300 USD/month + Setup Fees |
| Region Restart & Debug Tools | FREE | Included with monthly tier |
| Terrain & Environment Control | FREE | Included with monthly tier |
| Texture/Mesh/Asset Uploads | FREE & Unlimited | Fee per upload (e.g., L$10) |
| Total Cost for Full Creative Control | $0.00 | $3,600+ USD per year |
This isn't a limited-time offer; it's the foundation of our entire philosophy. Alife Virtual is a true Second Life alternative built on the robust Open Simulator platform, where your primary investment is your creativity, not your credit card.
What You Will Learn in This Class
Upon completing this master-level workshop, you will be able to:
- Navigate and understand every tab of the
Region/Estatewindow. - Implement robust security policies using estate bans and access lists.
- Perform a region restart to resolve performance issues and script errors.
- Utilize the powerful Object Return tool to clean your region efficiently and safely.
- Sculpt, shape, and texture your region's terrain to create any landscape imaginable.
- Control the sun, sky, and water settings to craft the perfect atmosphere for your environment.
- Establish a region Covenant to set clear rules for visitors and residents.
- Monitor your region's performance using live statistics to identify and fix sources of lag.
Prerequisites
- An active Alife Virtual account with your FREE private island claimed.
- A compatible viewer, such as Firestorm Viewer, installed and configured for Alife Virtual.
- Completion of Alife Virtual School Class 05: "Basic Building and Object Manipulation" or equivalent experience.
- A foundational understanding of how to navigate the virtual world and manage your inventory.
Detailed Tutorial: Your Guide to Region Mastery
Let's begin. The primary tool for everything we're about to do is the Region/Estate window. To access it, navigate to the top menu bar of your viewer and select World > Region/Estate. This will open a panel with multiple tabs, which is your command center.
Part 1: Mastering Region Security and Access Control
Your region is your private space. You have absolute authority over who can and cannot enter. This is managed primarily through the Estate and Covenant tabs.
The Estate Tab: Your Command Center
Click on the Estate tab. Here you'll see your Estate Name and the owner (you!). The most critical settings here are the access controls.
- Managing Access:
Allow Public Access: If checked, anyone can visit your region. If unchecked, only people on the "Allowed" lists can enter. This is the master switch for making your region private or public.Allow Direct Teleport: If checked, users can teleport directly to any point on your region. If unchecked, they can only arrive at designated teleport points (if you've set them up). For simplicity, most users leave this checked.
- Creating Whitelists and Blacklists:
- Allowed Residents/Groups: Use the
Add...button to specify individuals or entire groups who are always allowed access, even ifAllow Public Accessis off. This is perfect for creating private homes or exclusive club spaces. - Banned Residents: This is your ban list. Use the
Add...button to type the name of a resident you wish to permanently ban from your estate. Once added, they will be unable to enter your region and will be ejected if they are currently present. To remove a ban, simply select their name and clickRemove....
- Allowed Residents/Groups: Use the
Pro Tip: The Power of Group Roles
For more granular control, you can grant estate management powers to members of a group that owns the land. By editing a group role, you can allow trusted friends to manage bans, return objects, and change environmental settings. This is essential for collaborative region management.
Part 2: The "God-Mode" Toolkit: Restarts and Object Sweeps
Sometimes, a region needs a hard reset. Whether it's due to runaway scripts causing lag or a messy sandbox, you have the power to reboot the simulation or clear out objects instantly.
The Region Restart: When and Why to Use It
A region restart is a powerful diagnostic and repair tool. It reboots the simulator process for your specific region, which can fix a multitude of issues, including script lag, physics glitches, and ghosted objects. It does not delete any of your content.
- Navigate to the
Debugtab in theRegion/Estatewindow. - Click the
Restart Regionbutton. You will be asked to confirm this action. - The region will freeze for approximately 30-60 seconds and then come back online. You will be briefly disconnected and reconnected.
Common Mistake: Overusing Region Restart
Don't restart your region for every minor issue. It's a disruptive process for any visitors. Use it when you experience persistent, region-wide lag or after a major scripting change has gone wrong. For simple lag, first try identifying the source using the statistics panel (covered later).
The Object Return Tool: A Clean Sweep
This is one of the most powerful—and dangerous—tools at your disposal. It allows you to return objects to their owners' inventories. This is invaluable for cleaning up clutter, removing abandoned builds, or dealing with griefing objects.
- Navigate to the
Regiontab in theRegion/Estatewindow. - Find the section at the bottom labeled "Return all objects in region".
- You have several options:
- Return objects owned by a specific person: Click the
Owner...button, select the resident, and clickReturn. This is the safest and most targeted method. - Return all objects NOT owned by you or your group: This is excellent for cleaning up a public sandbox. Select the appropriate option from the dropdown and click
Return. - Return ALL objects: This is the nuclear option. It will return every single prim, including your own, to their respective owners. Use with extreme caution!
- Return objects owned by a specific person: Click the
Returned objects are sent to the owner's Lost & Found folder in their inventory.
Part 3: World Building 101: Terrain and Environment
This is where your artistic vision comes to life. You can shape the very ground you walk on and paint the sky above.
Sculpting Your World: The Edit Terrain Tool
Right-click on the ground anywhere in your region and select Edit Terrain from the pie menu (or press Ctrl+Shift+T). This opens the terrain editing tool.
- Tool Selection: Choose from tools like
Raise,Lower,Level(flattens to the height you click),Smooth(softens jagged edges),Roughen, andRevert(undoes changes). - Brush Controls: Use the
SizeandStrengthsliders to control the area of effect and intensity of your tool. Start with a large, weak brush for gentle slopes and a small, strong brush for fine details. - Bake/Revert: The
Bakebutton makes your changes permanent. TheRevertbutton discards all changes made since the last bake.
Painting Your Landscape: Terrain Textures
A beautifully sculpted landscape needs color and texture. You control this in the Region/Estate window.
- Navigate to the
Terraintab. - You'll see four texture slots. These correspond to different altitudes on your region.
- Texture 1 (Low): The texture for the lowest points (e.g., seabed, valley floor).
- Texture 2 (Mid-Low): The texture for gentle slopes.
- Texture 3 (Mid-High): The texture for higher elevations.
- Texture 4 (High): The texture for mountain peaks.
- Click a texture swatch to open the texture picker. You can use textures from your inventory. Thanks to Alife's free unlimited uploads, you can import any high-quality terrain texture you find or create.
- Use the
Terrain LowandTerrain Highsliders to control where the textures blend. Experiment to see how they interact. For example, to create a beach, set Texture 1 to a sand texture and adjust the sliders so it only appears near your water level.
Setting the Mood: The Environment Editor (Windlight)
The "sky" in Alife Virtual is a complex, customizable system. You can set a default environment that all visitors will experience upon arrival.
- First, find a sky you like. Go to World > Environment Editor > Sky Presets and experiment with the built-in options like "[AV] Midnight" or "[AV] Sunset".
- Once you have a sky you love, go back to the
Region/Estatewindow and click theEnvironmenttab. - In the "Environment Settings" dropdown, find and select the preset you chose.
- Click
Apply. Now, this environment is the default for your entire region.
Part 4: Governance and Information
A well-managed region is an informed region. Setting rules and monitoring performance are key to long-term success.
The Covenant: Setting the Rules of Your Land
The Covenant is a notecard that displays your region's rules to anyone who checks the land info. It's your social contract with your visitors.
- Create a new notecard in your inventory.
- Write your rules. Be clear and concise. Examples include rules on prim limits, commercial activity, adult content, or behavior.
- Save the notecard.
- In the
Region/Estatewindow, go to theCovenanttab. - Drag the notecard from your inventory into the box that says "Drop a notecard here". Your covenant is now set.
Real-Time Analytics: The Region Debug Console
Knowledge is power, especially when it comes to lag. The Debug tab gives you a live look at your region's performance.
- Navigate to the
Debugtab in theRegion/Estatewindow. - Key statistics to watch:
Time Dilation: Should be close to 1.0. If it drops, the whole region is slowing down.Sim FPS: The "frames per second" of the server. Should be steady at 45.0. Drops indicate severe strain.Total Prims: The total number of prims rezzed on your region.Script Time: The amount of processing time the server is spending on LSL scripting. This is the #1 source of user-created lag. If this number is high, you have a badly written or overly complex script running somewhere.Physics Time: Time spent on physics calculations. High numbers can indicate too many physical objects or complex collisions.
Use these tools to play detective. If your region is lagging, check the Script Time. If it's high, start investigating recently rezzed objects or use the object return tool on suspected items to see if performance improves.
Advanced Applications
- Automated Management with LSL Scripting: Use LSL functions like
llReturnObjectsByOwner()andllAddToLandBanList()in your own scripts to create automated security orbs, rental systems that eject overdue tenants, or self-tidying sandboxes. - Themed Environment Design: Go beyond presets. Create your own custom sky, sun, and water settings in the Environment Editor and save them. Combine this with custom terrain textures and a sculpted landscape to build truly unique worlds—a cyberpunk city under a perpetual neon twilight, or a fantasy forest in an endless magical dawn.
- Commercial Hub Setup: Use the estate tools to manage a shopping or event region. Ban problematic users, set a clear commercial covenant for vendors, and regularly check region statistics to ensure a smooth experience for customers during peak hours.
Practice Exercise: Your First World Makeover
Let's put it all together. Follow these steps to transform your region.
- Rename Your World: Go to the
Regiontab and change your "Region Name" to something creative. - Create a Lake: Use the
Edit Terraintool. SelectLowerwith a large, soft brush and carve out a basin in one corner of your region. Use theSmoothtool to soften the edges. - Set Water Level: In the
Terraintab, adjust theWater Heightso it fills your new basin. - Set a Mood: Find a "Midday" or "Noon" sky preset and set it as your region's default environment.
- Declare Your Law: Create a notecard named "My Region Rules" with a simple message like "Welcome to my island! Please be respectful." and set it as your Covenant.
- Check Your Vitals: Open the
Debugtab and take note of your region'sScript TimeandTotal Prims. This is your baseline.
Frequently Asked Questions (FAQ)
Can I undo an estate ban?
Yes. Go to the Estate tab, find the "Banned Residents" list, select the name of the person you want to unban, and click the Remove... button. Their access will be restored immediately.
What happens to objects when I use the "Return Objects" tool? Are they deleted?
They are not deleted. The objects are returned to a special folder in the owner's inventory called Lost & Found. From there, they can be rezzed again. This is a non-destructive process, but it can be very disruptive, so use it wisely.
I edited the terrain, and now my house is floating/buried. How do I fix this?
The terrain editor only affects the land itself; it does not move objects. After making significant terrain changes, you will need to manually enter build mode (Ctrl+B), select your objects, and move them vertically to match the new ground level.
My friends can't see the cool sunset sky I set up. Why?
You likely only changed your personal sky settings. For everyone to see it, you must set it as the region's default. Go to World > Region/Estate > Environment tab, select the sky preset from the dropdown menu, and click Apply.
How is it possible for Alife Virtual to offer a full, free region and all these tools for free?
Our mission is to build the most accessible and creator-friendly metaverse possible. By leveraging the efficient Open Simulator architecture and focusing on community growth over monetization, we eliminate the massive overhead and fees charged by older platforms. We believe a thriving virtual economy starts by empowering everyone to build, not by charging them for the land to build on.
Your World Awaits. Start Building Today.
You are now equipped with the knowledge to command your own slice of the digital universe. You can raise mountains, part the seas, set the sun in the sky, and write the very laws of your land. This level of creative freedom, offered completely free, is the heart of Alife Virtual.
If you've been reading this as a guest, wondering what it feels like to wield this power, the time to wonder is over. Join us today and claim your own world.
Join Alife Virtual Now and Get Your FREE 65,536 sqm Private Island!
Experience the ultimate creative freedom with your free pro mesh avatar, free unlimited uploads, and a supportive community ready to build the future alongside you. Welcome to the revolution.
🎓 Ready to Practice In-World?
Get your FREE island and practice everything you just learned — no credit card, no monthly fees.
Claim Your Free Island Now →No credit card required · Takes 2 minutes · Your island is FREE for one month