Alife Virtual School Class 3: Firestorm Debug Tools and Shortcuts
Firestorm Debug Tools and Shortcuts — Free class in Alife Virtual School
What You Will Learn in This Class
By the end of this tutorial, you will be able to:
- Activate and navigate Firestorm's advanced menus.
- Use the Statistics Bar to monitor real-time performance and diagnose lag.
- Confidently change settings in the powerful Debug Settings panel.
- Utilize the Quick Preferences panel for on-the-fly adjustments.
- Master dozens of essential keyboard shortcuts for building, photography, and troubleshooting.
- Identify and fix common issues like texture thrashing and high script load.
- Temporarily derender objects to maintain smooth performance in crowded areas.
Prerequisites
This is an intermediate-level class. Before you begin, you should have:
- An Alife Virtual Account: If you're not yet a resident, what are you waiting for? With over 1,148,000 members, a thriving community awaits. You can register for free here.
- Firestorm Viewer Installed: Alife Virtual uses the same powerful Firestorm Viewer as Second Life, so your skills are 100% transferable.
- Basic Viewer Skills: You should be comfortable with moving your avatar, using your camera, and managing your inventory.
- A Desire to Learn: These tools are powerful, but they require a bit of practice. Come with an open mind and be ready to experiment!
A Note on Experimentation: Don't be afraid to change settings! Almost everything we cover can be easily reset to its default value. The best way to learn is by doing, and Alife Virtual provides the perfect sandbox. With 10,000 prims on your free island and zero-cost uploads for mesh, textures, and animations, you can build, break, and fix things without any financial risk.
Main Tutorial: Your Journey into Firestorm's Engine Room
Ready to get your hands dirty? Let's dive in, step-by-step.Part 1: Unlocking the Power — Enabling Advanced Menus
By default, Firestorm hides its most powerful tools to prevent new users from accidentally breaking their experience. Our first step is to reveal them.
- Press the keyboard shortcut Ctrl + Alt + D.
- Look at the top menu bar (where you see "Avatar," "World," "Build," etc.). You should now see a new menu item appear: "Advanced."
- That's it! This menu is your gateway. But we can go one step further.
- Go to Avatar → Preferences (or press Ctrl + P).
- In the Preferences window, navigate to the "Advanced" tab.
- Check the box that says "Show Advanced Menu." This ensures it stays visible every time you log in.
- While you're here, check the box for "Show Develop Menu" as well. This will add another, even more technical menu to your top bar, which contains essential tools for creators.
- Click OK to save your changes.
You now have permanent access to the "Advanced" and "Develop" menus, the command centers for everything we'll learn today.
Part 2: The Statistics Bar — Your Performance Dashboard
The single most important troubleshooting tool is the Statistics Bar. It gives you a real-time, heads-up display of your viewer's performance.
- Press the shortcut Ctrl + Shift + 1 to toggle the Statistics Bar on and off.
- A bar of text and numbers will appear in the top right of your screen. It might look intimidating, but let's break down the most important parts:
| Statistic | What It Means | What to Look For |
|---|---|---|
| FPS (Frames Per Second) | How many new images your computer is drawing per second. Higher is smoother. | A stable 30+ FPS is great. Below 15 FPS will feel choppy. If your FPS is low, the problem is likely your computer struggling to render the scene (client-side lag). |
| Ping Sim | The time (in milliseconds) it takes for a message to travel from your computer to the Alife Virtual server and back. | Under 200ms is good. If this number is very high (500ms+), you're experiencing network lag or the server (sim) is under heavy load. |
| Packet Loss | The percentage of data "packets" that are lost between you and the server. | Should be 0.0%. Any number higher than zero indicates a poor network connection, which can cause rubber-banding, failed teleports, and other glitches. |
| Bandwidth | How much data the viewer is currently downloading (textures, avatar data, etc.). | If this is maxed out (check your setting in Preferences → Network & Files), it can cause textures to stay blurry. |
By looking at these numbers, you can instantly diagnose the *type* of lag you're feeling. Low FPS? It's your PC. High Ping? It's the network or the sim. This is the first step to solving any performance problem.
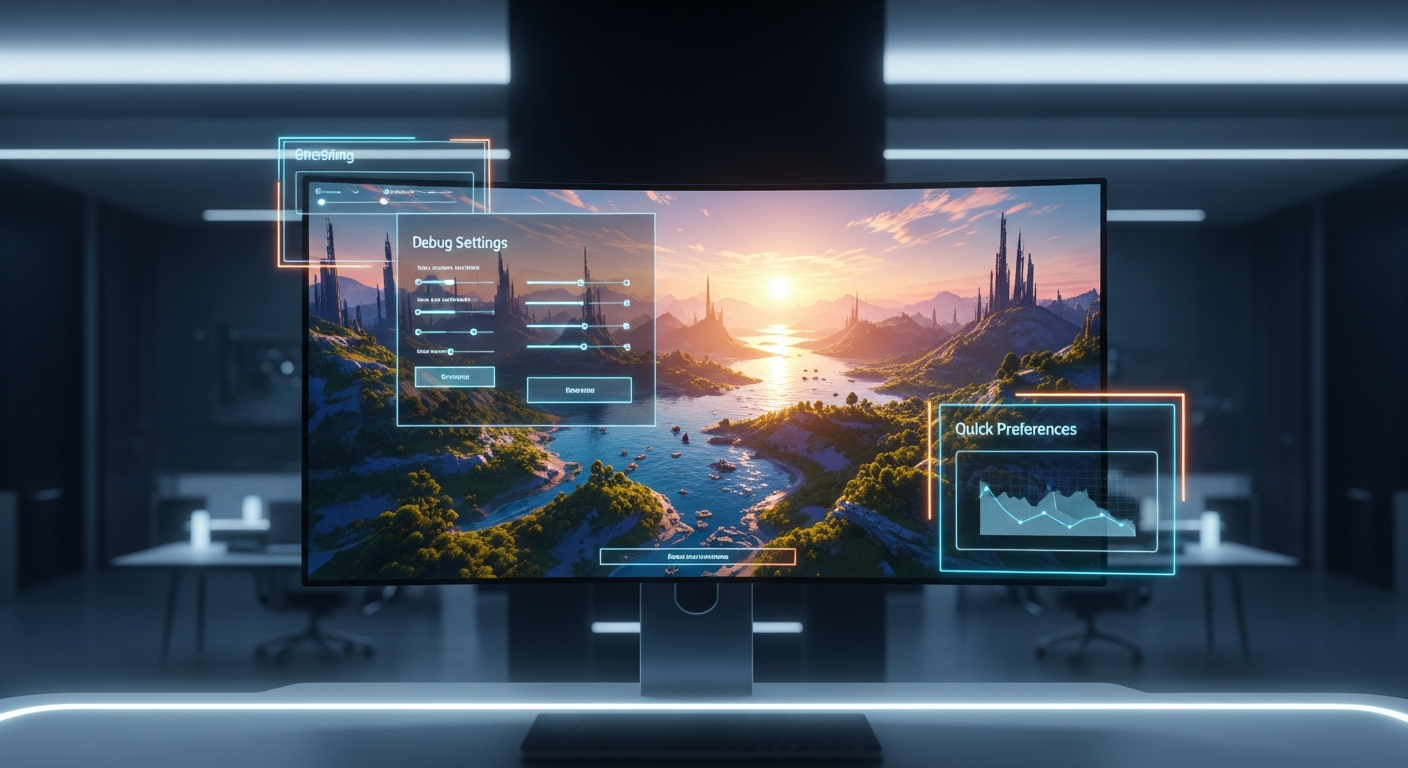
Part 3: The Debug Settings Panel — The Engine Room
This is where the real magic happens. The Debug Settings panel contains thousands of variables that control every conceivable aspect of the viewer. Don't be scared; you can't permanently break anything.
- Go to Advanced → Debug Settings (or press Ctrl + Alt + Shift + S).
- A window will appear with a long, intimidating list. Ignore the list. The most important feature is the search box at the top. You almost never browse this list; you search for the setting you need.
- Let's try a few practical examples.
Example 1: See Further Than Ever Before
The normal Draw Distance slider is limited. You can override it here.
- In the Debug Settings search box, type
RenderVolumeLODFactor. - Click on the setting in the list. You'll see its current value below (default is usually around 2.0).
- Increase this value to
4.0or even8.0. You will immediately see distant objects render with much more detail. - This is amazing for photography, but it comes at a cost to your FPS! Find a balance that works for you. To revert, just click the "Reset to default" button at the bottom of the window.
Example 2: Disable Camera Constraints
Ever get annoyed when your camera won't go through a wall or under the ground? You can turn that off.
- In the Debug Settings search box, type
CameraConstraints. - The default value is TRUE. Click the dropdown menu and change it to FALSE.
- Now, you can move your camera anywhere—through objects, under the terrain, and get the perfect shot for your machinima or building project. This is especially useful when planning a large build on your free Alife Virtual island.
Tip: When you change a setting in Debug Settings, it stays changed until you reset it or do a clean install of the viewer. If things ever start acting weird, your first step should be to think about what debug settings you've recently changed.
Part 4: Quick Preferences — Your Everyday Toolkit
The Quick Preferences panel is a curated collection of the most useful debug and graphics settings, presented in a user-friendly way. It's your go-to for quick adjustments.
- Find the small gear icon (⚙️) on the right side of the bottom button bar in Firestorm. Click it.
- A panel will slide out. This is Quick Preferences.
- Explore the tabs (General, Graphics, Performance). Here are some key settings to master:
- Max # of non-impostor avatars (Performance Tab): This is a lifesaver. It controls how many fully-rendered avatars you see at once. In a crowded club, turning this down to 3 or 5 will dramatically boost your FPS by turning distant avatars into simple "impostors."
- Draw Distance (General Tab): A simple slider for the most common graphics adjustment.
- LOD Factor (Graphics Tab): This is a slider for the
RenderVolumeLODFactorwe just changed in Debug Settings! It's a much easier way to adjust it. - Hardware Skinning (Graphics Tab): Always make sure this is checked! It offloads avatar animation to your graphics card, providing a huge performance boost.
Think of Quick Preferences as the "greatest hits" of the Debug Settings panel. Use it often!
Part 5: Essential Keyboard Shortcuts
Clicking through menus is slow. Power users live by keyboard shortcuts. Here are some of the most vital ones you should commit to memory. Since Alife Virtual supports full LSL scripting, just like Second Life, these building shortcuts will make you a more efficient creator.
Troubleshooting & Performance
- Ctrl + Shift + 1 : Toggle Statistics Bar
- Ctrl + Shift + R : Rebake textures (fixes corrupted or "muddy" avatar textures).
- Ctrl + Alt + T : Highlight transparent textures. Invaluable for finding invisible prims.
- Ctrl + Alt + F1 : Opens the Lag Meter, a more detailed performance floater.
Building & Creating
- Ctrl + B : Open the Build/Edit window.
- Ctrl + 1 : Select the Move tool.
- Ctrl + 2 : Select the Rotate tool.
- Ctrl + 3 : Select the Stretch tool.
- Shift + Drag an object : Duplicate the object.
- Ctrl + Shift + L : While editing an object, this toggles the display of its "Land Impact" or prim cost. Essential for managing your 10,000 prim allowance.
Photography & View
- Alt + Shift + H : Hide all User Interface (UI) elements for a clean screenshot.
- Ctrl + 0 : Center camera on your avatar.
- Ctrl + 9 / Ctrl + 8 : Zoom in / Zoom out.
Common Mistakes and How to Avoid Them
-
Mistake: Changing a debug setting and forgetting what it was.
How to Avoid: When troubleshooting, only change one setting at a time. If you mess something up, open Debug Settings, find the setting you changed, and click "Reset to default." If you're completely lost, you can reset all settings, but this is a last resort (see FAQ).
-
Mistake: Setting all graphics to Ultra and then complaining about 5 FPS.
How to Avoid: Performance is a trade-off. A beautiful scene with shadows and high detail requires a powerful computer. Use the Statistics Bar to see the immediate FPS cost of every setting you enable. Find a balance that gives you an acceptable framerate. Remember, Alife Virtual works great on almost any desktop, but you still need to be realistic about your hardware's capabilities.
-
Mistake: Assuming all lag is "server lag."
How to Avoid: Use the Stats Bar! If your Ping is low (<200ms) but your FPS is in the single digits, the lag is on your end (client-side). This means you need to lower your graphics settings, reduce avatar complexity, or derender objects. If your FPS is high but your Ping is 1000ms and Packet Loss is >0%, then it's a network or server issue.
Advanced Tips and Tricks
Feeling confident? Let's explore some even more powerful tools from the Develop menu.
- Temporarily Derender Objects: Is one specific, glittery, particle-spewing object killing your framerate? Right-click on it and go to More → More → Derender. The object will vanish from your screen (and only your screen), instantly freeing up resources. To get it back, you'll need to relog or restart the viewer.
- Hunt Down Laggy Scripts: On land you own (like your free island!), you can find out which scripts are using the most processing time. Go to Develop → Consoles → Script Info (or Ctrl + Alt + Shift + I). This opens a panel showing all active scripts on the parcel and their CPU time. It's the ultimate tool for optimizing your builds.
- Analyze Texture Memory: Curious why a region is using so much of your graphics card's memory? Go to Develop → Consoles → Texture Console. This shows you every texture currently loaded, its size, and its memory footprint. It's a great way to spot unnecessarily large textures that are hurting performance. Since Alife Virtual has free texture uploads, it's a good habit to check your own textures to ensure they are optimized.
Practice Exercise: Become a Performance Master
Time to put this knowledge into action. This exercise will show you the real-world impact of one of the most important performance settings.
- Log into Alife Virtual. If you have your own space, like the free 65,536 sqm private island we give to all residents, teleport there now. If not, don't worry! You can claim your free island and starter avatar here.
- Press Ctrl + Shift + 1 to open the Statistics Bar. Make a note of your current FPS in a relatively quiet spot.
- Find a busy, popular location in Alife Virtual. A welcome hub or a popular club is perfect.
- Once you're surrounded by other avatars, watch your FPS. It has likely dropped significantly.
- Now, open Quick Preferences (the ⚙️ icon). Go to the "Performance" tab.
- Slide the "Max # of non-impostor avatars" slider all the way down to
1. - Watch your screen. All avatars except the very closest will turn into simple, solid-colored "impostors." More importantly, watch your FPS on the Statistics Bar. It should jump up dramatically!
- Experiment by sliding that number up and down to find the perfect balance between performance and visual detail for your system.
Congratulations! You've just learned how to survive—and thrive—in the most demanding, crowded environments in any virtual world.
Frequently Asked Questions (FAQ)
- 1. Will changing these debug settings get me in trouble or banned?
- Absolutely not. These are standard, built-in tools for the Firestorm Viewer. They are there to be used. As long as you are not using them to exploit or harm the experience of others, you are perfectly safe.
- 2. Help! I changed a setting and now my viewer looks weird. How do I fix it?
- First, try to remember the setting you changed and use the "Reset to default" button in the Debug Settings window. If you're truly lost, you can perform a full settings reset. Log out of Alife Virtual. When you open the viewer again, before logging in, click Advanced → Clear Settings and Cache. This will reset *all* viewer settings to their factory defaults. Use this as a last resort.
- 3. Do these settings and shortcuts work in Second Life too?
- Yes, 100%! Alife Virtual uses the same Firestorm Viewer, so every skill you learn here is directly transferable. The big difference is that here in Alife Virtual, you have a massive, free platform to practice on, with free uploads and a free private island—advantages you won't find anywhere else.
- 4. My FPS is still very low even after turning all the graphics settings down. What else can I do?
- If your FPS is low even on minimal settings, it may indicate a hardware limitation or an issue outside the viewer. Make sure your graphics card drivers are up to date. Close other demanding applications running on your computer. While Alife Virtual is designed to run on a wide range of desktops without a VR headset, very complex scenes will always be demanding on older hardware.
Summary and Next Steps
You've made it! You are no longer at the mercy of lag or mysterious glitches. You now have the knowledge to look under the hood, diagnose what's happening, and tune your Firestorm Viewer for peak performance and efficiency. You can use the Statistics Bar to understand lag, the Debug Settings to customize your experience, and keyboard shortcuts to build and create faster than ever before.
Your journey to becoming a power user has just begun. We encourage you to keep experimenting. The more you use these tools, the more intuitive they will become.
Ready for your next challenge? Now that you can optimize your environment, it's the perfect time to learn how to create interactive content for it. We highly recommend you browse the other free daily classes at the Alife Virtual School, especially our upcoming classes on LSL Scripting.
Claim Your Creative Freedom in Alife Virtual Today!
Ready to put these skills to the test on your own slice of paradise? Alife Virtual is a vibrant, creative universe home to over 1,148,000 residents. Join our community, and we'll give you everything you need to get started, completely free.
Register today and receive:
- A FREE 65,536 sqm Private Island, yours to keep for one month (no monthly fees, unlike the $300/month for a similar island in Second Life).
- A FREE full-body mesh avatar with a wardrobe of custom outfits.
- A generous 10,000 prims to build your dreams.
No fees. No trials. Just endless creative freedom.
Register for Alife Virtual for FREE
Claim Your Free Island and Avatar Now!
🎓 Ready to Practice In-World?
Get your FREE island and practice everything you just learned — no credit card, no monthly fees.
Claim Your Free Island Now →No credit card required · Takes 2 minutes · Your island is FREE for one month