GLTF Scene Exports from Blender
GLTF Scene Exports from Blender — Free class in Alife Virtual School
Welcome, creators, to Alife Virtual School! In today's advanced building workshop, we're diving deep into a game-changing technique: GLTF Scene Exports from Blender. Forget the painstaking process of uploading individual objects and reassembling them in-world. This masterclass will teach you how to export entire, complex scenes from Blender—complete with materials, textures, and object hierarchies—and import them into Alife Virtual in a single, streamlined action. Mastering this skill is a massive leap forward for any serious builder, transforming your workflow from a slow crawl to a creative sprint. In a free 3D world like Alife Virtual, where your imagination is the only limit, efficiency is your greatest asset. This is how you build entire worlds, not just objects.
The Alife Advantage: Build Without Barriers
In the expansive metaverse, creative freedom often comes with a hefty price tag. Platforms like Second Life penalize creators with constant fees, turning a passion into a costly expense. At Alife Virtual, we believe in a 100% free economy where your talent can flourish without financial chains. Let's break down the staggering difference in cost for a serious builder:
| Feature / Action | Alife Virtual (The Free Second Life Alternative) | Second Life |
|---|---|---|
| Private Island (Full Region) | FREE (65,536 sqm, for one month) | ~$349 USD setup, then ~$230-300 USD per month |
| Mesh/Texture/Sound Uploads | FREE & UNLIMITED | L$10 per upload (real-world cost adds up quickly) |
| Total Cost for a Serious Builder (First Year) | $0.00 | ~$3,109+ USD (not including upload fees) |
This isn't just about saving money; it's about creative liberation. The techniques in this class, combined with Alife Virtual's free platform, give you an unparalleled advantage to build, experiment, and innovate at a scale that is simply impossible on other grids.
What You Will Learn in This Class
By the end of this tutorial, you will be able to:
- Properly prepare a multi-object Blender scene for a clean export.
- Understand and utilize Blender's
Principled BSDFshader for PBR materials that translate perfectly toglTF. - Preserve object hierarchies, locations, rotations, and scales from Blender to Alife Virtual.
- Package textures, materials, UV maps, and mesh data into a single, efficient
.glbfile. - Export and import an entire scene, rezzing it in Alife Virtual with a single click.
- Dramatically increase your building efficiency and project scope within our free
metaverse.
Prerequisites
- A foundational understanding of Blender 3.x or higher (navigation, object creation, basic materials).
- Blender (latest stable version recommended) installed on your computer.
- An Alife Virtual account (it's free!).
- The Firestorm Viewer, fully compatible with Alife Virtual.
- A passion for building and a desire to push the boundaries of what's possible in a
virtual economy.
Part 1: Master Your Scene's Foundation: Preparation in Blender
The secret to a perfect glTF export is 90% preparation. A clean, organized Blender file will result in a clean, predictable import. A messy file will cause endless headaches. Let's do it right.
Step 1: The Art of Organization with Collections
Think of Blender's Collections as intelligent folders for your objects. The hierarchy you create here will be preserved on export. This is the key to maintaining your scene's structure.
- In the Outliner panel in Blender, organize your scene logically. Create a main Collection for your scene (e.g., "
My_SciFi_Lab"). - Inside this main Collection, create sub-collections for logical groups (e.g., "
Walls_and_Floor", "Furniture", "Computer_Consoles"). - Place your individual mesh objects into the appropriate collections.
- Crucially: The parent-child relationships between objects are also preserved. If you parent a "
Screen" object to a "Monitor" object in Blender, they will be linked in Alife Virtual, allowing you to move the parent and have the child follow.
A well-named and structured Outliner is the blueprint for your in-world scene. Don't skip this step!
Step 2: Apply All Transforms - The Golden Rule
This is the single most common point of failure for beginners. In Blender's Object Mode, you might scale, rotate, or move objects. These "transforms" are stored as instructions. For a clean export, you must "bake" these instructions into the mesh data itself.
- Select all the objects you intend to export.
- Press Ctrl+A. A menu will pop up.
- Select All Transforms.
This action resets the object's location and rotation values to 0 and its scale to 1 in the properties panel, but visually locks the object's new state. Failing to do this can result in objects importing into Alife Virtual at the wrong size, orientation, or position.
Pro Tip: Origin Points Matter
The "Origin Point" (the little orange dot) of each object in Blender becomes its pivot point in Alife Virtual. For a door, set the origin to where the hinges would be. For a chair, set it to the center of its base. To change an object's origin, right-click in Object Mode, go toSet Origin, and choose an option likeOrigin to GeometryorOrigin to 3D Cursor.
Step 3: PBR Materials with Principled BSDF
glTF is built on a Physically Based Rendering (PBR) workflow. This means it expects materials that describe how light realistically interacts with a surface. Luckily, Blender's default material node, the Principled BSDF, is designed for exactly this.
- Select an object and go to the Shading workspace.
- Ensure your material uses a
Principled BSDFshader node. - Connect your texture maps to the correct inputs:
- Base Color: Your main diffuse or albedo texture.
- Metallic: A black-and-white map where white is 100% metal and black is 0% metal.
- Roughness: A black-and-white map where white is a very rough surface (diffuse) and black is a very smooth surface (shiny/reflective).
- Normal: Your normal map. Make sure to add a
Normal Mapnode between your image texture and the BSDF's Normal input, and set the texture's Color Space toNon-Color.
- Avoid complex, Blender-specific node setups (like mixing multiple shaders with a
Mix Shadernode unless you know they are supported). TheglTFexporter primarily understands the inputs on thePrincipled BSDFnode.
By sticking to this PBR standard, you ensure your materials look nearly identical in Blender and Alife Virtual, which supports PBR materials via its advanced lighting model.
Step 4: UV Unwrapping is Non-Negotiable
Every mesh that has a texture must have a clean UV map. The glTF format requires UVs to know how to apply your textures to the 3D model.
- Ensure all your textured objects are properly unwrapped.
- Check for overlapping UVs if you are baking lighting or ambient occlusion, as this can cause visual artifacts.
- You can have multiple UV maps, but the
glTFexporter will typically only export the one that is active for rendering (marked with a camera icon in the Object Data Properties tab).
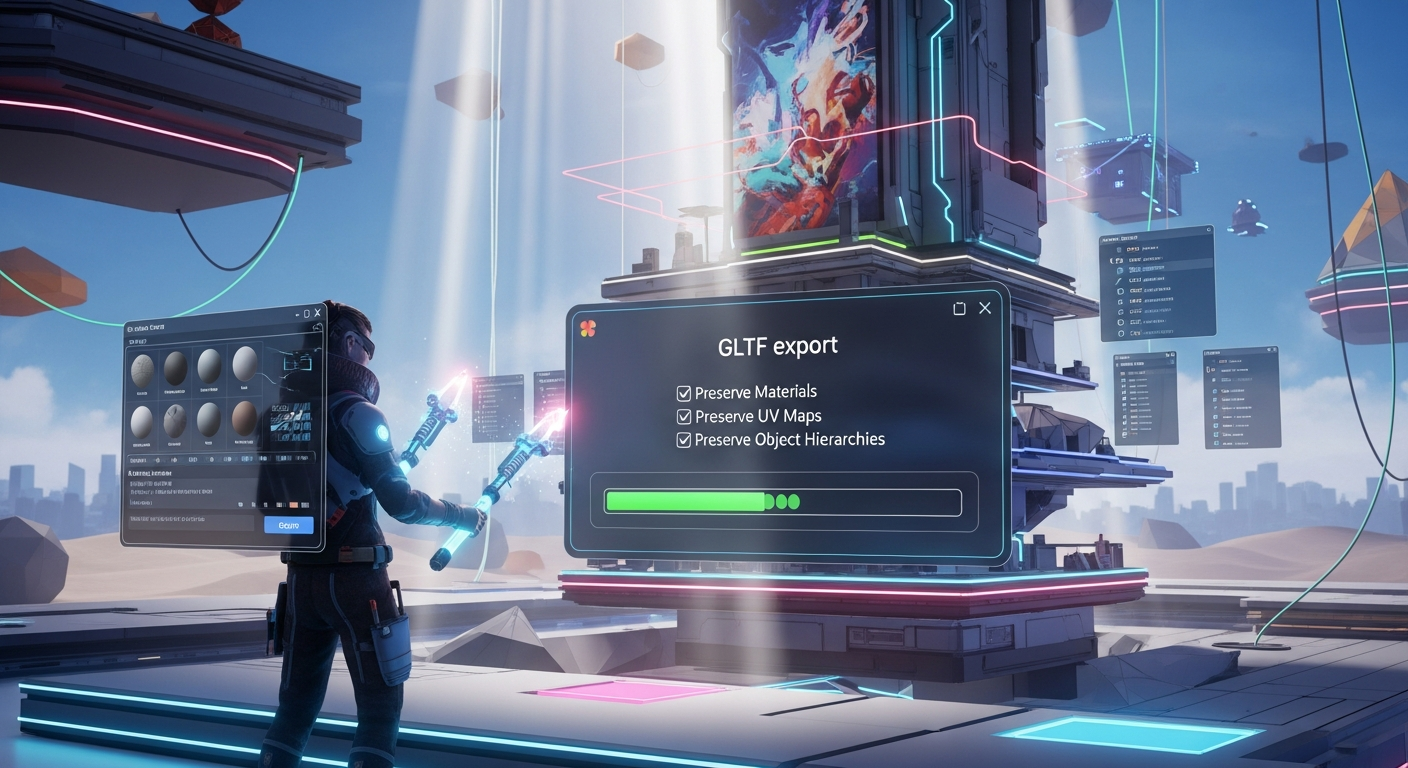
Part 2: The Export Process: Your Bridge to Alife Virtual
With your scene prepped and polished, it's time to export. The glTF exporter in Blender is powerful and has many options. We'll focus on the ones that matter most for Alife Virtual.
Step 1: Selecting and Exporting
- In Blender's Object Mode, select the top-level Collection in the Outliner that contains your entire scene. This ensures you only export what you intend to.
- Go to the top menu and click
File > Export > glTF 2.0 (.gltf/.glb). - The file export dialog will appear. On the right-hand side is the crucial settings panel.
Step 2: Configuring the glTF Export Settings
Let's go through the export panel tab by tab. These settings are vital.
Format:
- Choose
glTF Binary (.glb). This is the most efficient option as it packages all your mesh data, textures, and material information into a single, compact file. It's much easier to manage than a.gltffile with separate texture files.
Include Tab:
- Limit to: Check the
Selected Objectsbox. This is critical to ensure you only export the collection you selected, not everything in your Blender file. - Custom Properties: Check this.
- Cameras: Uncheck this unless you are specifically exporting cameras for a purpose like cinematic sequencing (an advanced topic).
- Punctual Lights: Uncheck this. In-world lighting in Alife Virtual is handled by the environment and region settings, not imported lights.
Transform Tab:
- +Y Up: Check this. Virtual worlds like Alife Virtual (and most
Open Simulatorgrids) use a Z-up coordinate system, just like Blender. This setting is generally correct by default, but it's good practice to ensure it's on.
Geometry Tab:
- Apply Modifiers: CHECK THIS. If you use modifiers like
Bevel,Subdivision Surface, orMirror, this option bakes their effect into the final mesh. The exporter does not export the modifiers themselves. - UVs: Check.
- Normals: Check.
- Vertex Colors: Check if you are using them.
Materials Tab:
- Export: Check.
- Image Format: You can leave this on
Automatic, but if you want more control, you can chooseJPEGfor color textures andPNGfor textures requiring transparency. The exporter is smart enough to pack these into the.glbfile.
Pro Tip: Create an Export Preset
Once you have these settings dialed in, click the "+" icon next to "Operator Presets" at the top of the export settings panel. Save these settings as "Alife_Scene_Export". The next time you export, you can simply select this preset instead of configuring everything again. This is a massive time-saver for any serious builder.
Step 3: Export!
Choose a file name, a location on your computer, and click the "Export glTF 2.0" button. Blender will process your scene and create the .glb file. For very large scenes, this may take a few moments.
Part 3: The Grand Finale: Importing to Alife Virtual
You've done the hard work. Now for the magic.
- Log into Alife Virtual using your Firestorm Viewer. Don't forget, we give every member a FREE Pro Mesh Avatar so you look great from day one.
- Fly to your FREE Private Island (all 65,536 sqm of it!).
- From the top menu, navigate to
Build > Upload > Mesh Model.... - Select the
.glbfile you just exported from Blender. - The "Model Upload" window will appear. This is where the power of
glTFshines. Give your scene a name (e.g., "SciFi Lab Scene"). - Go to the Options tab in this window. You will see a list of all the objects from your Blender Collections.
- Crucially: Check the box that says
Create object rezzers. - Click "Calculate weights & fee". In Alife Virtual, the fee is always $0 because we have FREE unlimited uploads.
- Click the "Upload" button.
After the upload is complete, you will find a new folder in your inventory with the name you provided. Inside this folder is a single object called a "Coalesced Object" or "Rezzer." Drag this object from your inventory onto your land.
Your entire Blender scene will rez, perfectly assembled, with all objects in their correct positions, rotations, and scales. All materials and textures will be applied. Congratulations, you have just mastered scene exporting!
Advanced Applications
This technique isn't just for static dioramas. Consider these advanced uses:
- Modular Building Kits: Design a set of walls, floors, and doorways in Blender. Export them as a scene. In-world, you can now link/unlink the pieces to reconfigure your build on the fly.
- Interactive Experiences: The imported objects are individual prims. This means you can add
LSL scriptingto them. Make a door that opens, a computer that displays text, or a light that turns on and off. You build the static scene in Blender, and add the interactivity in Alife Virtual. - Prefabs for Sale: As part of our 100%
free virtual economy, you can package and sell these scene rezzers to other residents. Build a beautiful house or shop, package it, and become a merchant—all without spending a dime.
Practice Exercise
Time to put your new skills to the test.
- Create a simple, furnished room in Blender. It must contain:
- At least 4 walls, a floor, and a ceiling.
- A table and a chair.
- A simple lamp on the table.
- A framed picture on one wall.
- Assign basic
Principled BSDFmaterials to everything. Use at least one image texture (e.g., for the wood on the table or the art in the frame). - Organize everything into a "
My_Room" collection with sub-collections for "Architecture" and "Furniture". - Apply all transforms. Check your origin points.
- Export the scene as a single
.glbfile using the settings outlined above. - Upload it to Alife Virtual and rez it on your free island. If it appears exactly as it did in Blender, you've succeeded!
Frequently Asked Questions (FAQ)
- 1. What's the difference between
.glTFand.glb? Why do you recommend.glb? .glTF(GL Transmission Format) is the base format, which often consists of a.jsonfile describing the scene, a.binfile for geometry, and separate image files for textures..glb(GL Binary) is a binary container that packages all of those assets into a single, convenient file. For uploading to a platform like Alife Virtual, a single.glbfile is vastly more efficient and easier to manage.- 2. How does a complex imported scene affect Land Impact (LI)?
- Land Impact is calculated based on the complexity of the final objects in-world. A scene with many small, highly detailed objects will have a higher LI than a scene with a few simple, optimized objects. The
glTFimport process itself doesn't change the final LI, but it makes managing high-LI scenes much easier. The upload window in the viewer will give you an LI estimate before you finalize the upload. - 3. Can I export animations with this method?
- Yes, the
glTFformat supports animations (known as "Actions" in Blender). In the export settings, under the "Animation" tab, you can choose to export the active actions. However, integrating these animations in-world requires advancedLSL scriptingto trigger and control them. This is a topic for a future masterclass! - 4. I imported my scene, but some textures are missing or pink. What went wrong?
- This almost always points to an issue in the material setup in Blender. The most common causes are: 1) Using a complex node setup that the exporter doesn't understand. Stick to the direct inputs of the
Principled BSDF. 2) The image texture files were not "packed" into the Blender file or the exporter couldn't find them. Using the.glbformat usually solves this by embedding them automatically. 3) You used a procedural texture (likeNoiseorVoronoi) without baking it to an image texture first. The exporter can only export image textures.
Your Creative Journey Starts Now
You now possess one of the most powerful and efficient building techniques available in the entire metaverse. Combined with the unparalleled freedom of Alife Virtual—your free full region, zero upload fees, and a thriving community—there is nothing stopping you from building the experiences you've always dreamed of. Stop paying to create. Start creating.
Ready to build without limits? Join Alife Virtual today and claim your FREE private island!
🎓 Ready to Practice In-World?
Get your FREE island and practice everything you just learned — no credit card, no monthly fees.
Claim Your Free Island Now →No credit card required · Takes 2 minutes · Your island is FREE for one month