CLASS 23: Linksets and Root Prim Strategy
Linksets and Root Prim Strategy — Free class in Alife Virtual School
Welcome, creators, to Alife Virtual School! If you've ever built a masterpiece only to have it fall into a jumble of pieces when you try to move it, this class is for you. Today, we're diving deep into one of the most foundational and powerful concepts in virtual world creation: Linksets and Root Prim Strategy. Mastering this skill is the crucial step that separates static props from dynamic, functional, and optimized objects. It’s the secret behind everything from complex vehicles to efficient architecture in any metaverse. In a vibrant and truly free 3D world like Alife Virtual, where your creativity is the only currency, understanding linksets allows you to build bigger, smarter, and more efficiently than ever before. This isn't just a building technique; it's a new way of thinking about object construction in an open simulator environment.
The Alife Advantage: Create Without Cost
In many virtual worlds, the biggest barrier to creativity isn't skill—it's cost. Building large, complex objects requires significant land and incurs upload fees that penalize experimentation. Alife Virtual was built to shatter those barriers. We believe in a 100% free economy where your imagination can flourish without financial constraints. Let's see how this philosophy directly impacts a builder's journey compared to a platform like Second Life.
| Feature | Alife Virtual | Second Life (Typical Costs) |
|---|---|---|
| Private Land (Full Region) | FREE (65,536 sqm for one month) | ~$300 USD per month |
| Uploading Textures, Mesh, Sounds, etc. | FREE & UNLIMITED | L$10 (~$0.04 USD) per upload |
| Initial Investment to Build | $0. Start building on your free island immediately. | High. Requires land purchase/tier fees and Linden Dollars for uploads. |
The difference is stark. In Alife Virtual, you can experiment with massive linksets, upload hundreds of test textures, and build a sprawling city on your free private island without ever paying a cent. This freedom makes mastering advanced topics like root prim strategy not just an academic exercise, but a practical tool for limitless creation.
What You Will Learn
By the end of this class, you will be able to:
- Define what a
linksetis and identify its components. - Understand the critical role of the
root primand how to strategically select it. - Master the correct procedure for linking and unlinking primitives.
- Use
LSL scriptingto interact with specific prims within a linkset by their link number. - Analyze and optimize the Land Impact (LI) of your builds by manipulating linksets and physics shapes.
- Avoid common mistakes that lead to broken objects, unexpected behavior, and high LI.
Prerequisites
This is an intermediate class. We assume you are already comfortable with the following in your Firestorm viewer:
- Basic camera controls (pan, zoom, orbit).
- Creating and manipulating prims (move, rotate, scale).
- Navigating the Build/Edit window.
- A basic understanding of what a prim is.
- Having your free Pro Mesh Avatar ready to get to work!
The Tutorial: A Deep Dive into Linksets
Part 1: Understanding the Linkset and the Root Prim
At its simplest, a linkset is a collection of two or more primitives (prims) that are joined together to act as a single object. When you move, rotate, or take a linkset into your inventory, all its constituent prims move together.
However, not all prims in a linkset are equal. One prim is designated as the root prim. Think of the root prim as the "brain" and "anchor" of the entire object. It holds all the most important information:
- Object Name & Description: The linkset as a whole takes on the name and description of its root prim.
- Permissions: The copy/mod/trans permissions for the entire object are determined by the root prim.
- Scripts: While any prim can hold a script, the primary or "controller" scripts are almost always placed in the root.
- Coordinates: The object's position and rotation in the world are stored in the root prim.
- Inventory: Any notecards, textures, or other items contained within the object are stored in the root prim's inventory.
The other prims in the linkset are called child prims. They are essentially followers, tethered to the root prim. Their individual names, descriptions, and permissions are suppressed in favor of the root's.
Part 2: The Golden Rule of Linking
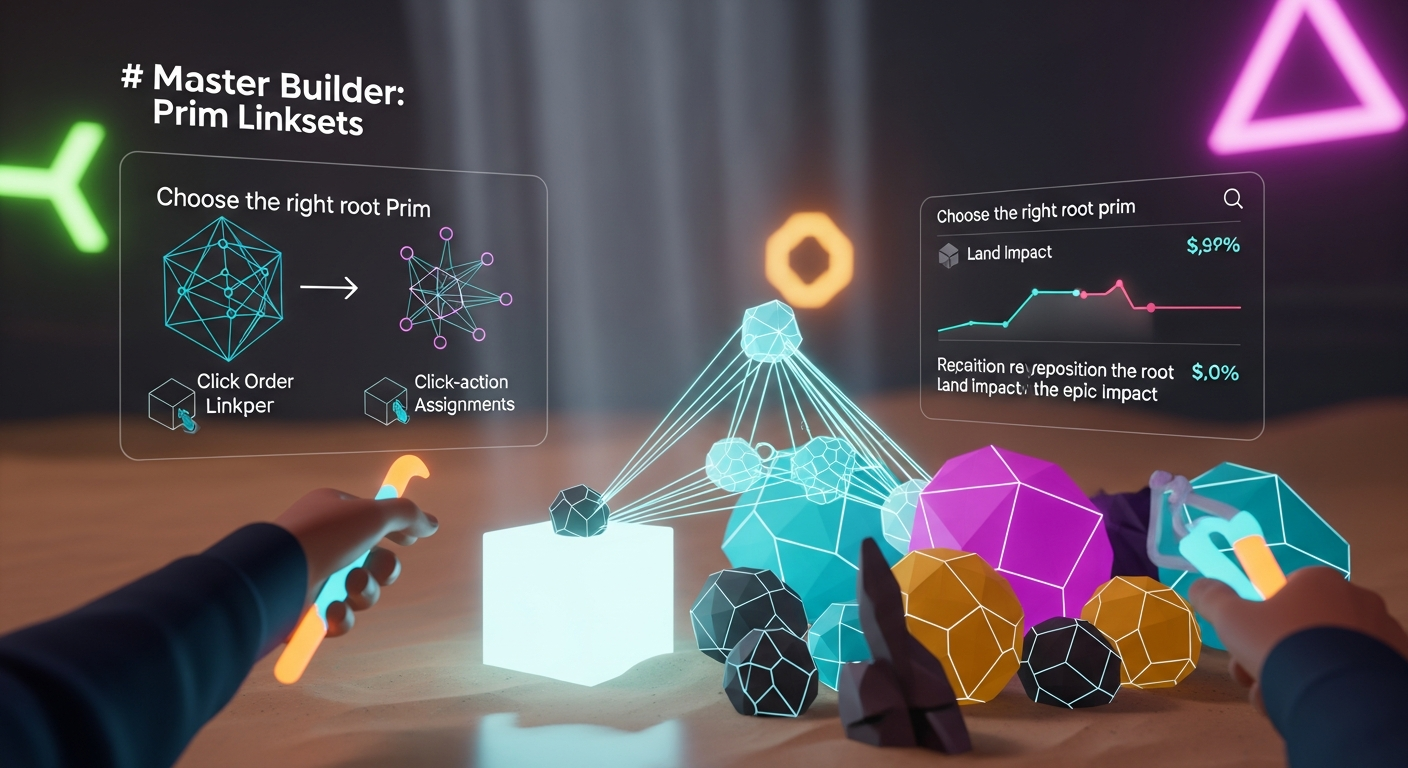
The viewer determines the root prim based on one simple, unchangeable rule: The last prim you select becomes the root prim.
Let's walk through the process. Imagine we are building a simple table with a top and four legs.
- Rez five prims: one flat box for the tabletop and four cylinders for the legs. Arrange them into the shape of a table.
- Decide on your root prim strategy. For a simple piece of furniture, the tabletop is a logical choice. It's the largest part and easy to select.
- Hold down the Shift key. Click on the first leg. It will be highlighted with a yellow outline.
- While still holding Shift, click the other three legs one by one. They will all have yellow outlines. These are your selected child prims.
- Finally, while still holding Shift, click the tabletop. It will be highlighted with a blue outline. The blue outline always signifies the prim that will become the root.
- With all five prims selected and the tabletop outlined in blue, go to the menu
Tools > Linkor simply press the keyboard shortcut Ctrl+L.
Congratulations! Your prims are now a single object. If you click on it, the entire table will be selected. If you move it, it moves as one. If you look in the Edit window's "General" tab, you'll see the name and description are whatever you set for the tabletop prim.
To unlink the object, simply select it and press Ctrl+Shift+L or go to Tools > Unlink.
Pro Tip: Before linking, give your intended root prim a descriptive name (e.g., "Dining Table - Oak"). When you link the parts, the entire linkset will automatically adopt this name, keeping your inventory organized.
Part 3: Strategic Root Prim Selection
Choosing the right root prim isn't arbitrary. A smart choice can make your object easier to use, script, and optimize. A poor choice can cause headaches.
For Static Objects (Buildings, Furniture)
For non-moving objects, the best root is usually a prim that is central, foundational, or easy to select.
- For a house: A floor prim or a central foundation block is an excellent choice. It's unlikely to be deleted and is easy to grab when you need to move the entire structure.
- For a chair: The seat is often the best root, especially if it contains the sit scripts.
For Physical/Moving Objects (Vehicles, Doors)
This is where root prim choice becomes critical. The root prim's position defines the center of rotation and the anchor point for physics.
- For a car: The root should be a central, often invisible, prim located at the vehicle's center of mass. All movement and rotation commands will originate from this point. Placing the root on a wheel would cause the entire car to pivot around that wheel—not ideal!
- For a swinging door: The root prim MUST be the door itself, not the frame. The script that makes the door rotate will be in the door. If the frame were the root, a script trying to rotate the root would rotate the entire door-and-frame assembly.
Common Mistake: Linking a door and its frame by selecting the frame last. The user then puts a rotation script in the door prim (now a child). When triggered, nothing happens, because a child prim cannot move independently using local rotation commands. The script must be in the root and must specifically target the child prim. It's far easier to just make the door the root in the first place.
Part 4: Link Order, Link Numbers, and LSL Scripting
For scripters using LSL scripting, the order in which you link prims has another layer of importance. The system assigns a number to each prim in the linkset, known as its link number.
- The root prim is always, without exception,
link number 1. - Child prims are numbered sequentially starting from 2, based on the order in which they were selected during the linking process.
Let's go back to our table example. If you selected the legs in order (Leg 1, Leg 2, Leg 3, Leg 4) and then the tabletop last:
- Tabletop (Root):
Link Number 1 - Leg 1:
Link Number 2 - Leg 2:
Link Number 3 - Leg 3:
Link Number 4 - Leg 4:
Link Number 5
Why does this matter? LSL functions like llSetLinkColor or llSetLinkPrimitiveParamsFast allow a script in the root prim to change the properties of any other prim in the linkset by targeting its link number. For example, you could write a script that makes only Leg 3 (link number 4) transparent.
// Example LSL code snippet placed in the root prim (Link 1)
llSetLinkAlpha(4, 0.0, ALL_SIDES); // This makes the prim at link number 4 invisible.
This is the foundation of creating complex, interactive objects where different parts behave independently, all controlled by a single master script in the root prim.
Part 5: The Elephant in the Room — Land Impact Optimization
Here we arrive at the most advanced and impactful part of our lesson. How you link your prims can have a dramatic effect on their Land Impact (LI), especially for large mesh builds. This knowledge is what separates amateur builders from professional content creators in any second life alternative.
First, understand that an object's LI is calculated based on three "weights": download weight, physics weight, and server weight. The highest of the three becomes the final LI. For complex builds, the physics weight is often the highest and the one we can most easily optimize.
The physics weight is determined by the object's physical shape. You can view and change this in the Edit window, under the "Features" tab, labeled Physics Shape Type.
The Default: Prim
When you link several objects, the linkset's default Physics Shape Type is Prim. This means the physics cost is the sum of the physics costs of every individual prim in the set. For a house made of 200 prims, this can be very high.
The Optimizer: Convex Hull
Changing the Physics Shape Type to Convex Hull tells the simulator to ignore the individual prims' physics shapes. Instead, it calculates a single, simplified physical shell that encompasses the entire linkset. Think of it like shrink-wrapping the whole object. For a complex object made of many small parts, this can reduce the physics weight—and thus the LI—by 50-90%.
The "Gotcha" with Convex Hull
Convex Hull creates a solid, non-hollow shape. If you set a house linkset to Convex Hull, you will have dramatically lowered its LI, but you will also have turned it into a solid block. You won't be able to walk inside! The "shrink-wrap" covers the doorways and windows.
The Professional Strategy: Hybrid Physics
The solution is to create a linkset with mixed physical properties before linking.
- Build your entire object (e.g., a house with walls, floors, windows, and doorways).
- Go through your build and select any prims that do not need to be solid. This includes window panes, interior decorative trim, and most importantly, invisible prims you place in doorways and window openings to keep them hollow.
- For all these selected prims, go to the "Features" tab and set their
Physics Shape TypetoNone. This gives them a physics weight of zero. They become phantom. - Now, perform the linking process. Select all the
None-physics prims first, then all the solid prims (walls, floor, roof), and finally, select your intended root prim LAST (e.g., the main floor prim). - Link the object (Ctrl+L).
- The resulting linkset will have a
Physics Shape TypeofPrimby default. Leave it that way.
The result? The total physics weight is the sum of only the prims you left as solid. All the decorative and "hole-making" prims contribute nothing to the physics cost. This allows you to build a detailed, walkable structure with a significantly lower LI than a basic linked object. The position of the root prim is also important here; a root prim placed far away from the rest of the object will create an unnecessarily large bounding box, which can negatively impact server weight and LI calculations.
Pro Tip: Use the "Display" menu in your viewer (e.g., Develop > Render Metadata > Physics Shapes in Firestorm) to visualize the physical shapes of your objects. This will show you exactly what your avatar can and cannot walk through, taking the guesswork out of optimization.
Advanced Applications
- Complex Vehicles: Create a car where a script in the root chassis prim targets the link numbers of the wheel prims, telling them to rotate when you press the arrow keys.
- Interactive Displays: Build a vendor with a display panel (child prim) and arrow buttons (other child prims). A script in the root prim detects clicks on the arrow buttons and changes the texture on the display panel using
llSetLinkTexture. - Articulated Machinery: Construct a robotic arm where each segment is a part of the linkset. A root script can control the rotation of each segment by targeting its link number, creating complex, coordinated movement.
Practice Exercise: The Scripted Door
Let's put this into practice on your free private island.
- Build a simple doorway: one prim for the door and two prims for the frame.
- Name the door prim "My Scripted Door".
- Select the two frame prims, then select the door prim last (so it gets the blue outline).
- Link them (Ctrl+L). The entire object should now be named "My Scripted Door".
- With the linkset selected, go to the "Content" tab of the Edit window and click "New Script".
- Double-click the new script to open it. Delete the default code and paste in the following simple rotation script:
// Simple Door Rotation Script
integer open = FALSE;

default
{
    touch_start(integer total_number)
    {
        if (!open)
        {
            // Open the door
            llSetRot(llEuler2Rot(<0, 0, 90.0> * DEG_TO_RAD));
            open = TRUE;
        }
        else
        {
            // Close the door
            llSetRot(ZERO_ROTATION);
            open = FALSE;
        }
    }
}
- Save the script. Exit edit mode.
- Click on your door. Because the door is the root prim (Link 1), the script in its inventory will execute, and the entire linkset will rotate. But because the frame prims are child prims, only the root's position changes relative to the world, creating the effect of a swinging door. (Note: for a real door, you would script the door child prim to rotate relative to the root frame, but this exercise perfectly demonstrates root prim control).
Frequently Asked Questions (FAQ)
- How do I edit just one prim in a linkset?
- In the Edit window, check the box that says "Edit Linked Parts". You can then click on any individual prim within the linkset to move, rotate, scale, or texture it independently.
- What is the maximum number of prims I can have in one linkset?
- On most Open Simulator grids, including Alife Virtual, the limit is 255 prims per linkset. However, for performance reasons, it's often better to use multiple smaller linksets for very large constructions.
- I linked my object and its name and description changed! Why?
- The linkset always inherits the name, description, and permissions of the root prim (the last one you selected). This is why it's good practice to name your intended root prim before you link.
- Can I change the root prim of an existing linkset?
- No, not directly. The only way to change the root prim is to unlink the entire object (Ctrl+Shift+L) and then re-link all the parts again, making sure to select your new desired root prim last.
Your Creative Future is Free
You now possess the knowledge to build smarter and more efficiently. This mastery of Linksets and Root Prim Strategy is a cornerstone of advanced creation, and in Alife Virtual, you have the ultimate sandbox to practice and perfect this skill.
Why pay hundreds of dollars a month or get charged for every single upload? That's the old way. The future of the metaverse is open, accessible, and free from creative tolls.
Join Alife Virtual today. Claim your for one month-free full region island. Enjoy unlimited uploads. Start creating with our professional mesh avatar and the powerful Firestorm viewer. Stop paying to create and start building your dreams.
Click Here to Join Alife Virtual and Claim Your Free Island!
🎓 Ready to Practice In-World?
Get your FREE island and practice everything you just learned — no credit card, no monthly fees.
Claim Your Free Island Now →No credit card required · Takes 2 minutes · Your island is FREE for one month